Wednesday, August 31, 2011

Upside Down Pineapple Cake- A Day at Dole Plantation


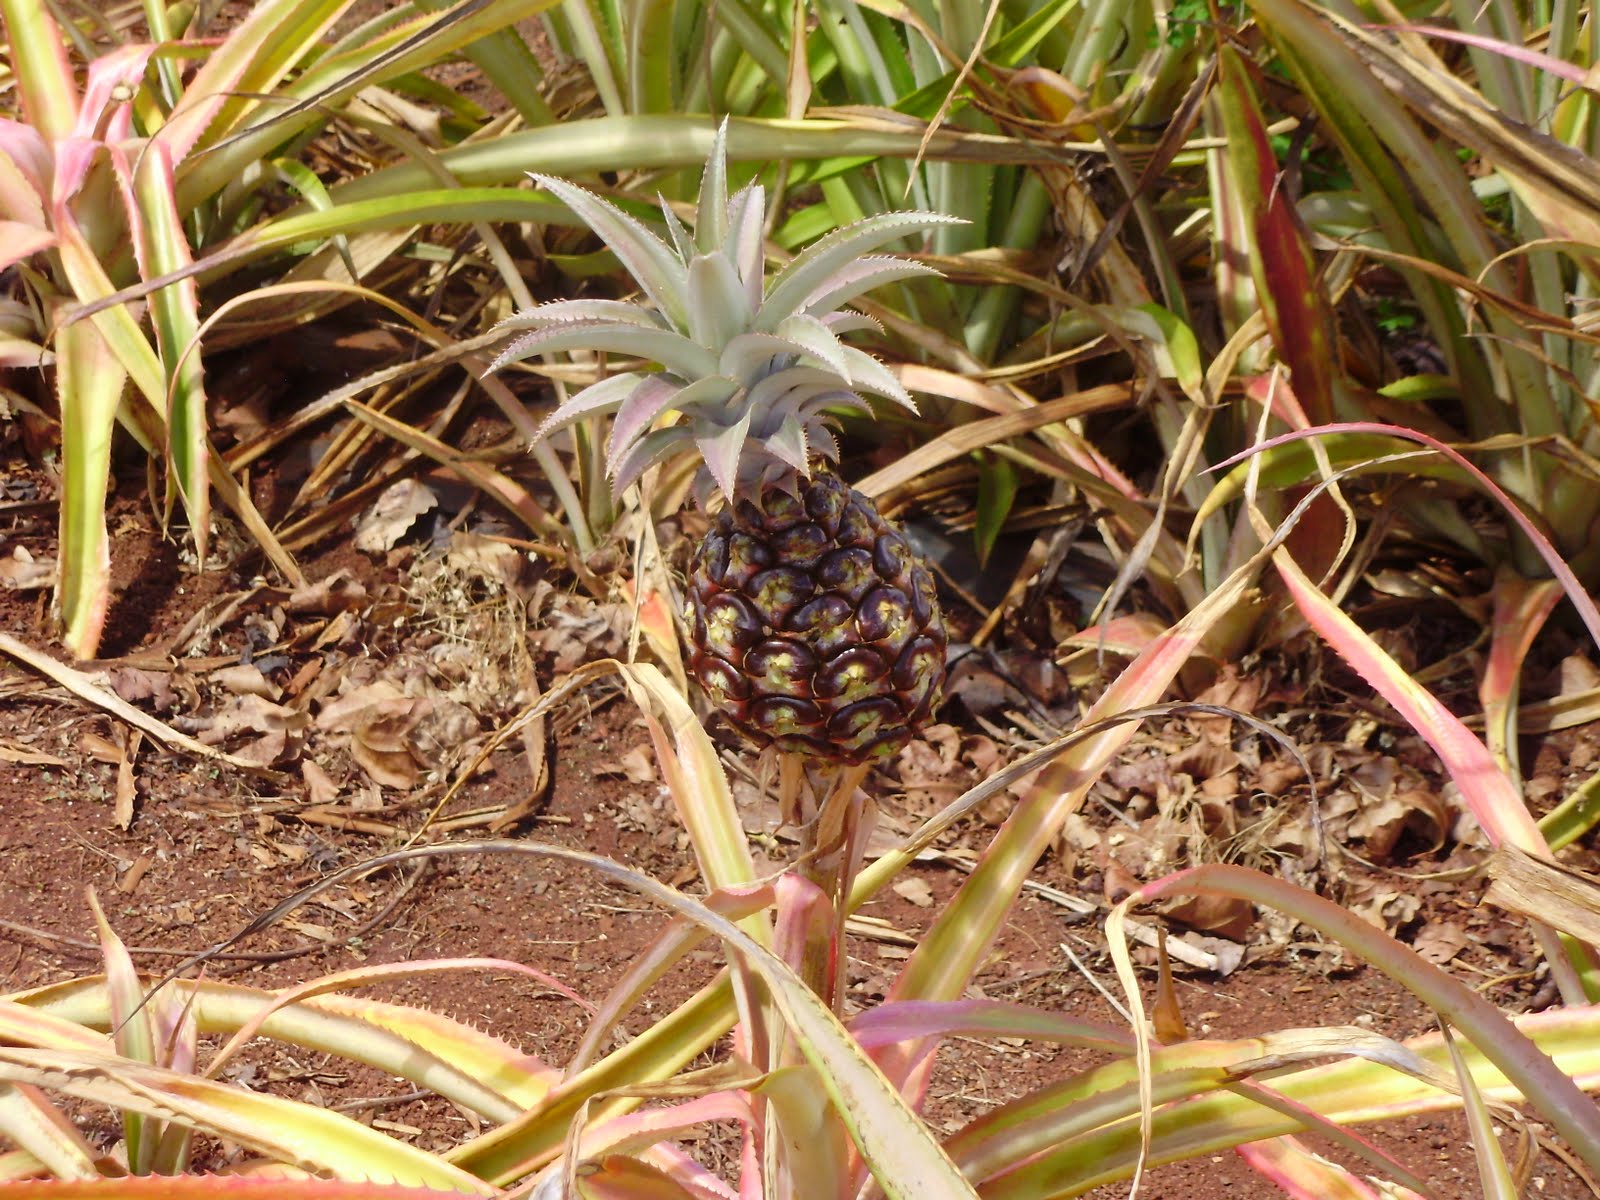
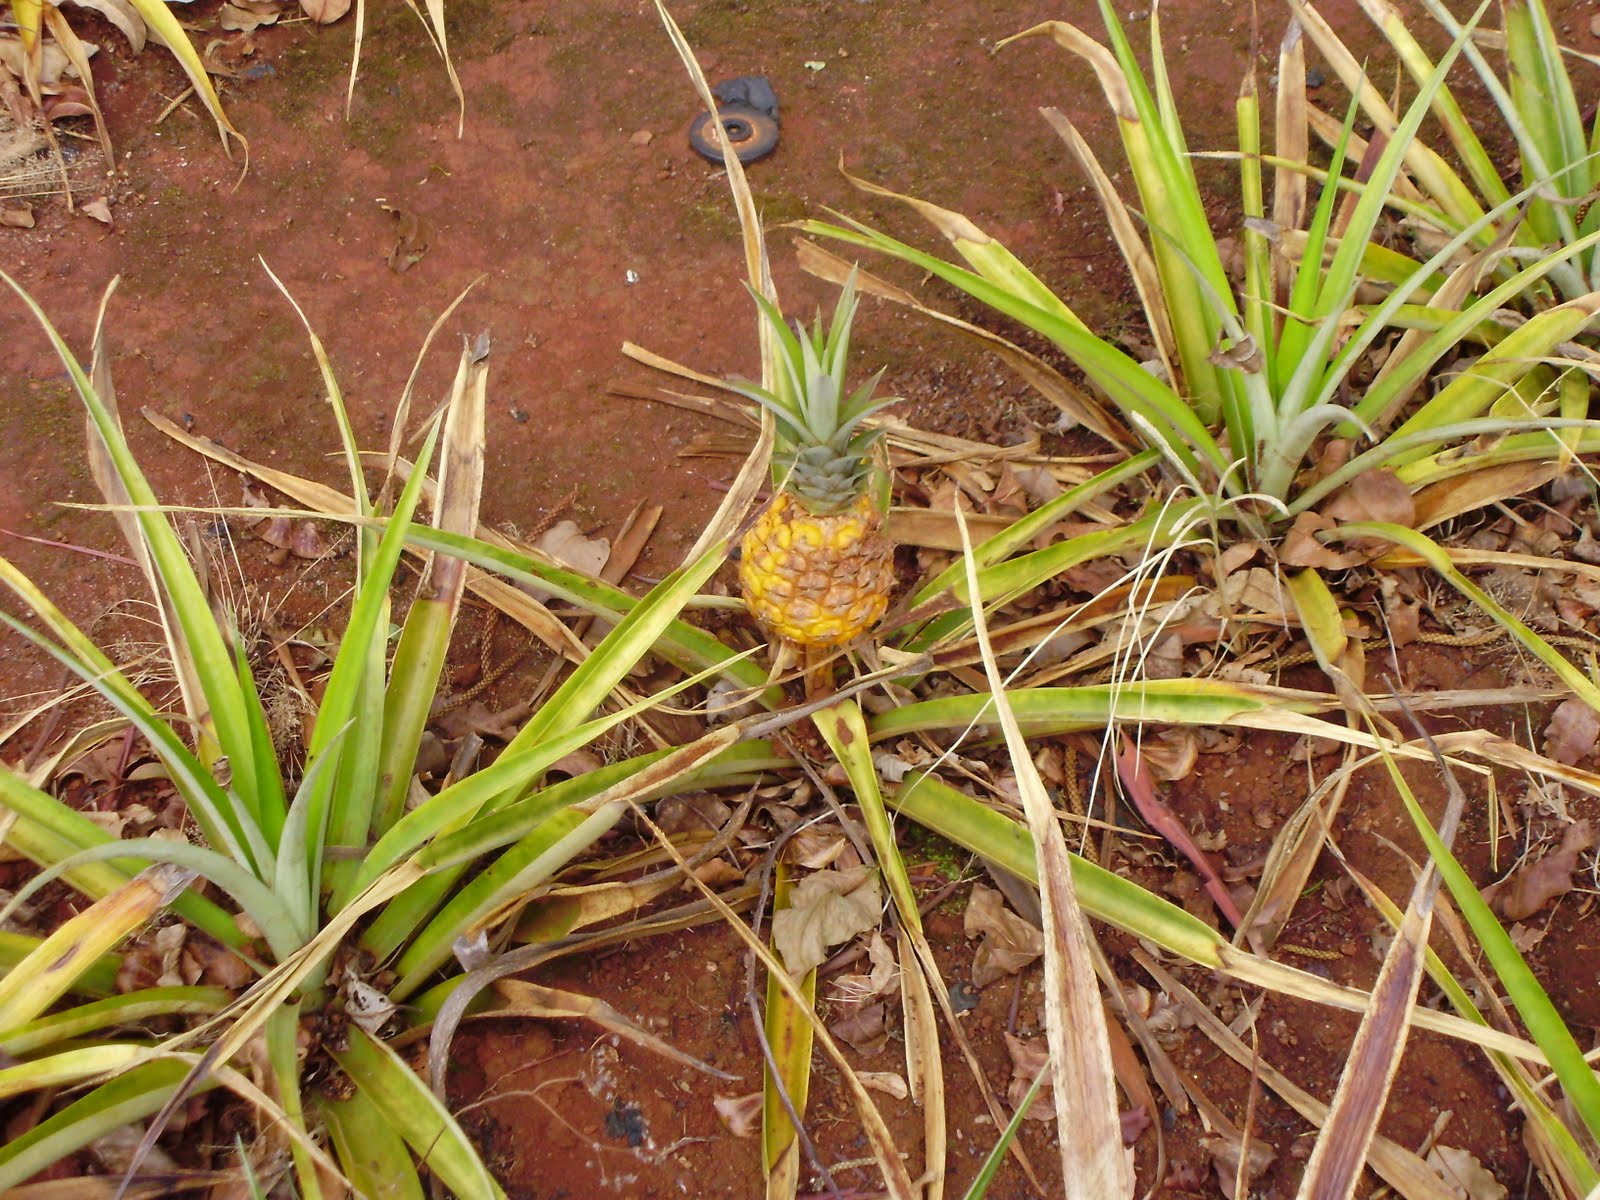
Aloha! Recently, I visited the Dole Plantation here in Oahu for the second time, and it still amazes me for some reason to see that pineapples grow from the ground! The Plantation itself is a tourist-magnet, and although it is quite overrated and overpriced to see the pineapple 'attractions' (yeah, I paid to ride a small train to see pineapple grow on the ground...) I still enjoy going there. They have the biggest souvenir shop of (mainly) pineapple based products and it's just so fun to browse through. Pineapple glazed popcorn, pineapple gumballs, pineapple paste, chocolate covered pineapples, pineapple chips...

Oh, and here are some pictures of the DIFFERENT kinds of pineapples I saw. I never knew they varied SO much in size and colour by region! Too cool!


As soon as I got back to the apartment, I knew I needed to make some Upside Down Pineapple Cake! This cake is super easy to make, and it's an all-time rustic favourite. It starts off with a "pan schmear", then you lay the pineapple on top, then you pour the cake batter, and in the oven it goes! You let it cool once it's done, and invert it onto a plate! Mmm, the pan schmear soaks through half the cake, coating the pineapple and the cake in a lovely golden buttery glaze. Who says cake needs icing?

Here's the secret though. The kitchen was in short supply of butter and brown sugar for the cake itself, so this cake is semi-homemade. I looked for a recipe that used yellow cake mix to make everything easier. I'm not a fan of baking with cake mix alone but I don't consider it cheating when you are only enhancing the mix. :) When I took a trip to the store however, they didn't have yellow cake mix. All they had was chocolate...but I did find a box of Cornbread Mix on sale, so I thought 'why not?'. The cake had transformed into an Upside Down Pineapple Polenta cake! I included both recipes, you can take your pick! I just love the texture of cornbread though with the yellow cake, you will get a much lighter cake! Also I am not sure if this brand of cornbread mix is well known so you are much more likely to find the yellow cake mix. Try both if you can!

Note: I used canned pineapples. Fresh is definitely better, but the canned variety are just as great in this cake and saves you A LOT of time!

Upside Down Pineapple Polenta Cake
  • 1 stick (1/2 cup) butter, room temperature
  • 1 cup packed brown sugar
  • 1 1/2 tbsp honey
  • 1 tsp rum (I opted this out)
  • 1/4 tsp vanilla
  • dash salt
  • 1 can Pineapple Rings in Pineapple Juice (The Dole brand was great!)
  • 1 box Krusteaz Fat-Free Cornbread Mix (This is the just-add-water variety)
  • 1 1/4 cup pineapple juice (Instead of water, I used pineapple juice from the can)
Preheat oven to 350 degrees F. Cream the butter with brown sugar, honey, rum, vanilla, and salt until smooth. Spread onto the bottom of a greased 9" cake pan. You will have some pan schmear left over. Set both aside.

Drain the pineapples but keep the juice. You can slice and lay the pineapples on top of the pan schmear in any way you like, many just choose to keep the rings and lay it out! What I did was cut each ring into three equal segments (kind of like cutting a Mercedes sign if you know what I mean..) and then overlapping each segment from the outside in...like laying bricks. With the remaining pan schmear, you can choose to just spread some on top the the pineapple slices. This syrupy glaze will soak through your cake keeping it nice and moist!

In a separate bowl, mix the Cornbread Mix with pineapple juice until smooth. Pour and spread on top of pan schmear and pineapple. Bake for 15 minutes, then rotate the pan and bake for another 30 minutes. Insert a knife into the middle of the cake, if it comes out clean it's done! Let it cool for 30 minutes before running a knife around the edge of the pan and inverting it onto a plate.


Upside Down Pineapple Cake (Using Yellow Cake Mix)
  • 1 stick (1/2 cup butter)
  • 1 cup packed brown sugar
  • 1 tbsp honey
  • 1 tsp rum
  • 1/4 tsp vanilla
  • dash salt
  • 1 can Pineapple Rings in Pineapple Juice
  • 1 box Duncan Hines Yellow Cake Mix*
  • 3 eggs
  • 1/3 cup vegetable oil
  • 1 1/3 cups pineapple juice from the can
*Any cake mix will do, you will just have to adjust the egg, oil and pineapple juice (instead of water) in accordance to the box instructions.

Preheat oven to 350 degrees F.

Cream the butter with brown sugar, honey, rum, vanilla, and salt until smooth. Spread onto the bottom of a greased 9" cake pan. You will have some pan schmear left over. Set both aside.

Drain the pineapples but keep the juice. You can slice and lay the pineapples on top of the pan schmear in any way you like, many just choose to keep the rings and lay it out! What I did was cut each ring into three equal segments (kind of like cutting a Mercedes sign if you know what I mean..) and then overlapping each segment from the outside in...like laying bricks. With the remaining pan schmear, you can choose to just spread some on top the the pineapple slices. This syrupy glaze will soak through your cake keeping it nice and moist!

In a separate bowl, prepare your cake mix with the eggs, oil, and pineapple juice following the box instructions. Pour batter over pineapple and smooth. Bake for 30-45 minutes until inserted knife comes out clean. Cool for 30 minutes before inverting! Enjoy!

Tuesday, August 30, 2011

Sweet Potato Pie (Faux Pumpkin Pie!)


(Sorry about the rushed pictures, I really didn't want my aunt to gawk at me macro-ing the s**t out of my camera and pouncing around the slice of pie to get a 'decent picture'. I seriously need a better camera)

Wow I had a pretty amazing/intense work-out at the gym today. I ran for 50 minutes on the treadmill, just under 9km! And then I finished with an advanced pilates class and holy I'm going to feel it tomorrow...right now I'm at a Starbucks in Waikiki just enjoying the day by myself. I'm alone today so it's relaxing to walk the streets though I'm too tired now to do the shopping that I wanted to get done...darn!

About the recipe...yes, it is a pie recipe. A Fall season pie recipe....
I'm not necessarily welcoming Fall with open arms and a warm embrace, but I've been wanting to make a sweet potato pie (as I am not TOO fond of pumpkin pie) for a long time! And with September just around the corner...(*cries*)...why not now? It's super easy, and so very tasty. I love yams and sweet potatoes, and this recipe makes a very rich-tasting pie without all the fat and calories!

The only boo-boo I made with this pie is that I was supposed to buy the sweet potato with orange flesh (CAN SOMEONE PLEASE TELL ME WHAT THE DIFFERENCE IS IN THE NAME BECAUSE I ALWAYS BUY THE WRONG ONE!) but I ended up (again- must be the 3rd time now) with the sweet potato with the yellow flesh. There isn't anything wrong with the yellow-fleshed sweet potato, the flavor is very much similar, but the pie was supposed to be a show-stopping gorgeous orange colour. I titled it "Faux Pumpkin Pie" because the filling turned out to be slightly brown like pumpkin pie. So if you know your orange sweet potatoes from your yellow, do buy the orange ones. The colour on the pie will be amazing! And don't try telling me it's yam that I'm looking for because that's what I first thought about yam, but the yam flesh was yellow too. I seriously need to google this for future reference.

Oh, and because my aunt doesn't have a mixer I made this pie using her blender. Go me! :D

Sweet Potato Pie makes 1 pie, 8 slices
  • 1 unbaked 9" pie crust
  • 2 large sweet potatoes
  • 2 tbsp butter, room temperature
  • 3/4 cup brown sugar, packed
  • 2 eggs
  • 1 tsp cinnamon
  • 1/4 tsp nutmeg
  • 1/2 cup skim milk
  • 1 tsp vanilla
  • 1/2 cup walnuts, finely chopped
  • 1/4 cup brown sugar
Boil the sweet potatoes for about 55 mins, or until soft. Under cool running water, peel the skin. Puree in a blender for 1 min, until smooth. Add butter, and mix well. Transfer mixture to a bowl.

Using an electric mixer, mix in sugar, eggs, cinnamon, nutmeg, milk, and vanilla until smooth. Pour into pie crust and bake at 350 degrees F for 55-60 mins, or until the filling is set. You can insert a knife into the center of the pie, if it comes out clean, it's done.

Sprinkle walnuts on pie and 1/4 cup brown sugar. Broil in oven until brown sugar is bubbly (watch carefully! you don't want to burn the sugar!).

Cool to set the filling for about 1/2 hour before cutting to serve! Enjoy!

Monday, August 29, 2011

Mango-Papaya-Coconut Sherbet


Hello hello again!

I'm in such a good mood right now! It's about 3:00 in Honolulu, and I just feel like my day's been started off right, and it's going in a good direction! It was a rainy one today, so we hit up the 24 Hour Fitness gym in the morning! I had a REALLY AMAZING short and sweet 1/2 hr run on the treadmill, and I was glad to see that I haven't spiralled tooooo far downhill in fitness as far as running goes. After that I finished off with a pilates and yoga fusion class. My arms...ouch!

We decided to grab some lunch so we went to the Ala Moana market place food court, and I spotted this salad bar. Well, it was a salad bar to a Steak&Fish Place but a salad bar nonetheless. You don't know how excited I get when I see salad bars. So many wonderful veggies (I've been eating them like crazy!) and little add-ons like chickpeas, corn kernels, seeds, yum! Now, I usually pay for salad at the bar by weight, and it just adds on and on and I end up paying over $10 for a small salad. This place, I paid around $4.50 for a "small container" first and then they just gave it to me to put whatever I wanted on it. Wait, are you kidding me!? No salad by the weight?! Whatever can fit inside this small container for $4.50!? Seriously just made my day. I wish I'd gotten a large because the container was overflowing and I was seriously going crazy with it.

Oops I'm rambling. About the recipe! I had originally wanted to make a chocolate brownie ice cream, but Honolulu is FULL of these HUGE juicy mangos and papayas, so I decided to make a tropical sherbet! The method I used doesn't require an ice cream maker, but if you have one, use it by all means! Also, the original recipe called for cream but I substituted it with some evaporated milk. You can even get a can of non-fat evaporated milk too, it'll save you the calories! So try it! Squeeze every drop out of summer before school starts!

Mango-Papaya-Coconut Sherbet makes approx. 4 cups
  • 2 cups mango, cubed (about 1 HUGE mango or 2 small ones)
  • 1 cup papaya, cubed
  • 1/2 cup sugar
  • 1 cup evaporated milk
  • 1 cup ice
  • 1 tsp vanilla extract
  • 1 tbsp coconut milk powder (optional, you can sub 1 tsp coconut extract if you have it)
Puree the mango, papaya, and sugar in a blender until smooth. Add remaining ingredients in blender and puree until smooth. Pour into a deep freezer-safe container and put it in the freezer for 45 mins.

1. After 45 mins, give it a stir/mash to break up any ice crystals that may have formed.
2. For the next 2 hours, at each 30 min interval, take out the container and mash the sherbet to break up ice crystals. Set a timer so you don't forget!
3. Freeze over night! Scoop and enjoy the next day!

Notes: You can substitute the papaya for strawberries or even bananas! Either would compliment the mango nicely!

Blogging from Honolulu- Leonard's Bakery

Aloha! I've been missing baking so much! :( I'm on vacation in Honolulu, currently staying with my aunt, and it's too hot to turn on the oven! There's not much bakeware or a mixer either! I have some recipes coming up though, I think! She's been wanting me to bake her something. :P

In the meantime, I'll blog about this all-famous Leonard's Bakery that they have here.
Every time we drive by, there's a line up that floods the outside patio all around the parking lot. "What's the big deal?" I thought. And after some research and a visit, I can definitely understand why this bakery stands out on the Hawaiian islands!
Leonard's has been up since July 1 1952, and it's a real authentic bakery! The story is that in June 1882, Arsenio and Amelia DoRego sailed into Maui from Portugal to work in the sugar cane fields. Their grandson, Leonard, moved to Honolulu with his wife and opened a bakery!

The bakery is known for their Malasadas, originally Portuguese, but the islanders have adopted it as the "Hawaiian Donut". It is sort of like a Tim-Bit, but a lot bigger and a thousand times better! It was so hot, fluffy, and soft... They make it constantly throughout the day, which is why people line up to get their's nice and fresh, right out of the fryer! This is the original sugar Malasada, one of their two originals (plain sugar and cinnamon sugar)

They are a little bit smaller than fist! I don't think I'll enjoy any other American donut after this. Since their two original flavors, they started a line of custard/cream filled Malasadas, such as chocolate, custard, or haupia, kind of like a coconut cream. That's what I got:
So good!

The bakery also has many other kinds of pastries, cakes, and breads. I kind of liked the rustic, home-made look of their goodies! Felt and tasted like home baking! :)

Hopefully I'll get to visit again soon!! And I've got a recipe (hopefully) coming up so stay tuned! Enjoy the rest of your summers! (Can you believe it's almost over?! *cries*)

Mary

Wednesday, August 17, 2011

The Elvis Softserve (BANANA AND PEANUT BUTTER ICE CREAM)


Oh my gosh. I don't think I can express the excitement and JOY this recipe brought me, and I can hardly contain myself typing this post because I just want to share it with you so bad.

On my list of favourite foods (well, there are categories of course...you can't just list your favourite foods in order...) ice-cream probably ranks first. And I mean any kind of 'ice cream'; gelato, frozen yogurt, sorbet, soft serve...ahh the list goes on and on...

SOMETIMES I FEEL SO SAD. Do you know how hard it is to live the life of a food fanatic and want to constantly stay in good shape!? Haha, I'm laughing, but I'm serious. Sometimes the two just fight at each other, and one usually ends up being sacrificed for the other!

And then comes this recipe. I might even just stop buying ice cream, period. This recipe is so guilt-free it's ridiculous, and given my love for peanut butter and banana, I knew I had to try it. It has 2 ingredients. It doesn't require an ice-cream maker (I KNOW!!!). It's vegan. And to my huge surprise, it's not actually ice CREAM because there is no CREAM in this. As Novice Chef describes it, it's ass-friendly!

I can't even begin to tell you how surprised I was at how amazing and creamy it was. It had the exact texture of a soft-serve ice cream, just creamier. This recipe is so great. You just gotta like bananas!

Elvis Soft Serve Ice-Cream makes 4 servings
  • 4 extra-ripe bananas
  • 2 tbsp peanut butter
Slice bananas thinly and freeze until completely frozen. In a food processor, combine frozen bananas with peanut butter and puree until smooth. You MAY need to add a tablespoon of water or milk (if you are not vegan) to get the texture you want. Serve immediately or transfer to a container and freeze until hard for a traditional scoop ice cream version. ENJOY!!

Flaxies


It gets kind of quiet in my house at night, so I've been doing a lot of overnight baking. It's kind of awesome, you get 6-8 hours to yourself in the kitchen with no one telling you stop! Sadly, those days are coming to an end BUT on a very very very bright note, I'm flying out to Honolulu this afternoon to meet up with my bros! Summer has finally begun! :P

These are the perfectly chewy kind of oatmeal cookies, but they aren't masked by cinnamon like most oatmeal cookies are, so the flax seeds just shine out in all their glorious flavor. The flax seeds make the cookies so nutty and aromatic.

I'm proud of these cookies because I made the fat substitutions myself! I wasn't too sure how it was going to turn out, since too much applesauce instead of butter can make oatmeal type cookies really rubbery. These were awesome though, you can't even tell the difference!

Flax is full of fiber, anti-oxidants and Omega-3 fatty acids. They can help to lower cholesterol and stabilize blood sugar. :)

Flaxies makes approx. 40 cookies
  • 1/4 cup butter, softened
  • 1/4 cup applesauce
  • 1/3 cup granulated sugar
  • 1/2 cup packed brown sugar
  • 1 egg
  • 1/2 tsp vanilla
  • 1 cup all purpose flour
  • 3/4 cup quick-cooking oats
  • 2/3 cup flaxseeds
  • 1 tsp baking soda
Preheat oven to 350 degrees F and line 2 cookie sheets with parchment paper.

In a bowl, beat together butter with sugars until light and fluffy. Add egg and vanilla, following with applesauce and mix until combined (scraping sides of bowl once).

In a separate bowl, whisk together flour, flaxseeds, oats, and baking soda. Stir into butter mixture to form a soft dough.

Drop cookies by level tablespoonfuls about 2" apart from each other. Bake on centre rack of oven for 12 mins until golden, rotating and switching pans halfway through. Let cool on pans for 2 mins before transferring to a wire rack.

Each cookie contains only about 59 calories!

Tuesday, August 16, 2011

Lemony and Summery Berry Pancakes


Ahhh, the joys of living alone! I get to have pancakes for dinner! :) Hope you don't mind two breakfast recipes in a row, cause I certainly don't. I love breakfast food!

As a kid, pancakes were never really a norm for me, nor were they ever considered "special". I'l confess that it was maybe because I didn't really like them as a kid. I liked French toast and I liked waffles...but wasn't really a fan of pancakes. They were mushy and didn't hold up to maple syrup like crisp waffles, and got too soggy and sloppy to eat. But these were amazing! And let me tell you why:

They're refreshingly light lemony pancakes, studded with colorful summer berries. So girly. :) And there's something about the blend of whole wheat flour and oat flour that just fits! The texture is just so right! Please tell me that I'm not the only one that thinks whole wheat and whole grains just tastes better in food?! The original recipe from Novice Chef uses some vegetable oil and honey as a sweetener, but this recipe omits both and uses applesauce. It works perfectly! You can use any of your favourite small berries, I used raspberries and blueberries!

Lemony and Summery Berry Pancakes makes 8 to 10 pancakes, 2 per serving
  • 1/2 cup all purpose flour
  • 1/2 cup whole wheat flour
  • 1/2 cup old-fashioned oats
  • 1 tsp baking powder
  • 1/2 tsp baking soda
  • 1/2 tsp salt
  • 3/4 cup skim milk
  • 1/2 tsp vanilla
  • 1/2 tsp cinnamon
  • 1 egg, room temperature
  • 1/4 cup applesauce
  • zest of one lemon
  • 1 tbsp lemon juice
  • 1 cup of your favourite berries
Preheat oven to 200 degrees F (optional) it is just to keep your pancakes warm while others are cooking.

In a large food processor, pulse flours and oats until the oats are ground. Add all the other ingredients except for berries and process until smooth (or you can mix by hand).

Heat a pan or skillet over medium heat and lightly grease with non-stick cooking spray or margarine. Drop batter by 1/4 cup (standard ice cream scoop works the best!) and arrange 6-8 of your berries on top of the pancakes. When you start to see bubbling, flip and cook another 1-2 mins until both sides are browned. Transfer onto a cookie sheet into the oven to keep warm if you wish. Repeat process until you have used up all the batter!

You can also freeze the pancakes! Just allow to cool completely, and then put it in a Ziplock bag to freeze. Just stick it into the toaster oven or microwave to reheat! Enjoy cause I certainly did!

Monday, August 15, 2011

Teaser: The Most Amazing Breakfast I've Ever Had In My Whole Memory of Life

Well, in my opinion anyway. I don't know if I was monstrously hungry this morning...but I did know that I've been craving peanut butter for a very long time. And bananas. And French toast. And mmm maple syrup...so I combined everything together.

I think in my previous life I was Elvis Presley, or his greatest fan who worshiped his every move and habit, because to me, bananas taste the best slathered with peanut butter. And peanut butter toast tastes a lot better with a drizzle of maple syrup than in a sandwich with jelly. Am I messed up!?

So I call this...The ElvisCristo French Toast! Do you get it? Cause it's like a MonteCristo sort of, because it's like a sandwich that is egg dipped and fried on the griddle like a MonteCristo except instead of ham and cheese, it has peanut butter and bananas. Just like how Elvis would like it. And it's a French toast because you eat it with maple syrup.

There is no picture because I devoured it in a minute flat, but if I do make this again (definitely will) and I have the patience to take a picture with my crappy digital camera, I shall post it on here. Mmm I want another one. For lunch and dinner. And tomorrow's breakfast too...but I'll try to resist the urge. Here's the recipe, super easy, super indulgent, and it'll make you feel like a rockstar. I'm serious. I really wanted to just get up on my table and jam with my air guitar. Okay that wasn't funny.

The ElvisCristo French Toast serves 1 (but in all honestly, I could probably eat 2 or 3..)
  • 2 slices of sturdy white French bread (that's the standard, but I used Light Rye...works perfectly)
  • 2 tbsp peanut butter (more or less, if you know what I mean...)
  • 1/2 banana, sliced
  • 1 egg, lightly beaten
  • 2 tbsp milk
  • 1/2 tsp cinnamon
  • 1 tsp sugar
  • powdered sugar and maple syrup to serve
  • margarine for the griddle, or butter-flavored non-stick cooking spray
Heat griddle or fry pan over med-high heat, and grease with margarine or spray with cooking spray.

Spread peanut butter on both slices of bread, and lay the banana slices on one bread slice, and place the other slice over top, to make a Peanut Butter Banana Sandwich.

In a shallow dish, beat egg with milk, sugar, and cinnamon. Being careful not to let the sandwich fall apart, dip both sides of sandwich in egg mixture and fry on griddle, about 1-2 mins on each side until golden.

Sprinkle with powdered sugar and drizzle with maple syrup to serve.

*Note* If you do not like bananas, this recipe would work great as a Peanut Butter Apple Slice combo too, since that's a popular sandwich type too! Granny smith or any crisp tart apple would work great. :)

P.S. My brain right now is having a funky brain-blast where it's taking me to many different possibilities of this breakfast idea...
Peanut Butter Apple Sandwich French Toast?! PB & J FRENCH TOAST?! PB AND NUTELLA FRENCH TOAST?! Really, the possibilities are endless.

Sunday, August 14, 2011

Starbucks Chocolate Banana Smoothie


So Starbucks has their whole 'treat receipt promotion' going on where I can get a cold drink after 2 pm for $2 if I get my morning tea!? When I first heard this at the beginning of summer, I thought it was the greatest deal ever! Now they're freakin' robbing me penniless LOL! If I run into a Starbucks in the morning, I'll usually get my regular tea for on-the-go, and then when they offer me my treat receipt, it's like, "Okay...$2 is a great deal...why not!?" So instead of spending $2 most days for coffee or tea, I'm now spending $4 (and that doesn't include the HST!) I guess I really gotta stop going for my coffee/tea in the morning to resist this temptation...

I'm yakkin'. Onward with the recipe! I never go for frappuccinos at Starbucks, for some reason I feel like if I take a sip I'll gain like 10000 lbs instantly. I think I tried one (it was really good by the way) one day (cause I wanted to redeem my treat receipt...sigh) but it was too much of a mouthful telling them what I wanted. "Can I get a...grande, non-fat, no whip, half-sweetened, extra ice mocha coconut frappuccino?" The drink is in bold if you can't find it in my order. They're extra nice about customization but if someone gave me an order like that I'd be pretty pissed.

Oh! I'm yakkin' again. So basically what I usually get is their chocolate banana smoothie (non-fat or soy, half sweet, half protein). It's one of the healthier options on there anyway! This recipe isn't a copycat recipe that I made because I liked the Starbucks smoothie so much, but it's a regular breakfast smoothie I make for myself at home, and I've been having it before I knew something similar existed from Starbucks. And by similar, I mean absolutely the same. It was awesome! Mine's healthier though, because instead of chocolate syrup, I use cocoa powder. It's heart healthy, richer, and makes you feel extra-indulgent without all the calories!

Chocolate Banana Smoothie makes 1 serving, 16 oz, or a 'grande' size
  • 1 small ripe banana
  • 1/2 cup skim milk
  • 8 ice cubes
  • 1/2 scoop chocolate whey protein powder (optional)
  • 1 heaping tablespoon unsweetened cocoa powder (more or less to taste ;) .... )
  • 1 tsp Splenda (more if not using protein powder)
Combine ingredients in a blender and blend until smooth! Delicious!

Saturday, August 13, 2011

Blueberry Buttermilk Scones


Okay folks, I did not get a new camera or acquired better photo-taking skills. First, I'd like to make it clear that the above is not my picture, but it's a picture from Gimme Some Oven, because I didn't get a chance to take a picture of mine tonight (and her's look a lot better)! Also, I had a total-baking-fail moment with these blueberry scones so they are too shameful to look at and show you over the Internet. :) They were ugly, but don't worry! The recipe (from Brown Eyed Baker) doesn't fail, so they were oh-so-delicious. The buttermilk makes it so fluffy, flaky, and they just melt in your mouth. They're wonderful! They are supposed to be a gift to Jenny at Oscar's Cafe where I work because tomorrow is the last shift I will waitress for her until I leave on VAYCAY to Hawaii for three weeks. I felt bad for taking so much time off...hopefully the deliciousness of these scones will make up for the time I owe her AND how atrocious they look...

So...Miss Math Honours right here (THAT'S ME!!) can't do simple fractions, cause with these scones, she was faced with the daunting challenge to cut a circle into 12 pieces that were SUPPOSED to look like the above picture. Nice, triangular, proportionate. But nope, somehow I ended up with 13 TINY slivers of scones that somehow bent in a funny way in the oven because they were so thin, so they look like the letter "J". Hey, "J" for Jenny right?

I suggest dividing the dough in half, patting each into a round, and cutting 6 pieces from each one. So much easier, and they'll probably look a lot better!

Don't be discouraged by my mistake though! These scones were amazing and I'm sure they'll taste even better warmed up with that cup of coffee tomorrow morning. :)

Blueberry Buttermilk Scones makes 12 scones... ;)
  • 1 1/2 cup all-purpose flour
  • 1/2 cup cake flour*
  • 3 tbsp sugar
  • 2 1/2 tsp baking powder
  • 1/4 tsp salt
  • 1/2 cup (1 stick) of butter, cold and cubed**
  • 1/2 cup buttermilk
  • 1 egg
  • 1/2 tsp vanilla extract
  • 1 cup blueberries
  • 1 tbsp sugar mixed with 3/4 tsp cinnamon for sanding
*If you don't have cake flour (I did not have any with me tonight) you can substitute for *just* under 2 cups all-purpose flour plus 1 tbsp corn starch
**A great trick with cutting in butter to scone and pastry dough is to freeze your butter, and then grate it with a cheese grater! No pastry blender needed!

Preheat oven to 375 degrees F, and line a cookie sheet with parchment paper.

In a large bowl, whisk together flours, 3 tbsp sugar, baking powder, and salt. Cut in butter with pastry blender, or rub it in with the flour until the mixture resembles a coarse meal. Gently mix in blueberries.

In another bowl, combine buttermilk with egg and vanilla. Drizzle into flour mixture and mix with a fork until a dough comes together.

On a lightly floured working surface, turn dough out and knead 2-3 times. Pat into a 1" thick round (or two for smaller scones) and cut into 12 EQUAL pieces (or 6 if you have two rounds).

Combine 1 tbsp sugar with cinnamon and sprinkle on top of scones. Transfer onto cookie sheet and bake 22 mins until golden. Cool on a wire rack! Enjoy!!

Friday, August 12, 2011

Raspberry Lemon Crumble Muffins


Wowza. I think I scored MAJOR brownie points with these muffins, recipe credit to Urban Strawberries! I cannot believe how *BEAUTIFUL* they look and I will use this crumble topping recipe for everything and anything!

My family and I went berry picking last weekend, so we had some extra raspberries on hand...and we all know lemons and raspberries are a match made in heaven.

Now, I did look through 'mini-muffin' and 'low-fat' recipes, but when you have such plump beautiful berries, and the most delicious-looking streusel crumble topping recipe in front of you, you really have to go all out with these babies! So limit yourself to one and send the rest to your neighbors! (That's what I'm doing :P)

Raspberry Lemon Crumble Muffins makes 12 muffins
  • 2 3/4 cups all-purpose flour
  • 1 tbsp baking powder
  • 1/2 cup sugar
  • 1 egg
  • juice of one lemon + enough milk to fill 1 cup
  • zest of half a lemon
  • 4 tbsp canola oil
  • 1 cup raspberries
Crumble Topping
  • 1/3 cup sugar
  • zest of half a lemon
  • 3 tbsp flour
  • 1/4 cup sliced or chopped almonds (optional)
  • 2 tbsp melted butter

Preheat oven to 400 degrees F and line or grease a 12-muffin tin.

Prepare the crumble topping: mix together sugar, lemon zest, flour, and almonds. Mix in butter until crumbly and moist. Set aside.

In a large bowl sift together flour and baking powder. Stir in sugar. Make a well in centre.

In another bowl, whisk together egg, milk/lemon juice, lemon zest, and oil. Pour into the well of flour mixture and mix quickly until just combined and moist. Gently fold in raspberries. Divide batter among 12 muffin cups and top each muffin with crumble topping, gently pressing it onto the muffin top.

Bake 20-25 minutes (I baked mine for 23) or until a toothpick inserted in the centre of your largest muffin comes out clean. Transfer to a cooling rack.

Tuesday, August 9, 2011

Red Velvet Cupcakes with Cream Cheese Frosting


I am honestly in shock after having these cupcakes, and utterly ashamed to admit that before these cupcakes, I have never had red velvet. I sort of knew what it was, but I didn't really know what was so special about it, or what it's flavor was. Now I know.

What makes red velvet a little bit more distinct and different, is that asides from being red, there's a slight hint of cocoa, buttercream, and always some vinegar and baking soda. I followed Brown Eyed Baker's recipe to the punctuation, and boy did they turn out! So light and fluffy, too with just the perfect hint of cocoa!

I was never into cakes before (aside from the ice-cream and cheesecake variety) but these have converted me for life!

The recipe calls for 12 cupcakes, but I made 6 regular size ones and ended up with 10 petites. I knew I wanted to bring these to school if they turned out. :)

Red Velvet Cupcakes with Cream Cheese Frosting makes 12 cupcakes
  • 4 tablespoons unsalted butter, at room temperature
  • ¾ cup granulated sugar
  • 1 egg
  • 2½ tablespoons unsweetened cocoa powder
  • 2 tablespoons red food coloring
  • ½ teaspoon vanilla extract
  • ½ cup buttermilk
  • 1 cup + 2 tablespoons all-purpose flour
  • ½ teaspoon salt
  • ½ teaspoon baking soda
  • 1½ teaspoons distilled white vinegar
Preheat oven to 350 degrees F and line 12-cup muffin tin with paper liners.

Cream butter with sugar on med-high heat until light and fluffy, 3 mins. Add egg and beat on high until smooth, scraping sides of bowl once.

In another bowl, combine cocoa powder with vanilla and food colouring to form a thick paste. Add this to butter mixture and beat on med-high, scraping sides of bowl to make sure the mixture is evenly coloured.

Reduce mixer speed to low, and add half of the buttermilk, then half of the flour. Beat on high until smooth. Return speed to low, and repeat process. Scrape sides of bowl.

Return speed to low, and add salt, vinegar, and baking soda. Turn the speed back onto high and beat until smooth for a couple of minutes. Divide batter among cupcake tin, and bake for 20 minutes, or until a toothpick inserted into centre of cupcake comes out clean. Cool in pans for 10 minutes, before transferring cupcakes onto a wire rack to cool completely. Frost with cream cheese frosting. (see below)

Cream Cheese Frosting
  • 8 oz low-fat cream cheese
  • 1 cup powdered sugar
  • 1 tsp vanilla extract
Beat cream cheese on high until smooth. On low speed, add powdered sugar and vanilla and mix until just combined. Return to high speed and beat until smooth.


Hummus (Low Fat)


Mmm how I love hummus! Hummus can be a great nutritious alternative to other types of dip, and it's so tasty! I love having it inside a pita pocket stuffed with red peppers, zucchinis, and grilled chicken. :)

This recipe calls for non-fat plain yogurt, very little tahini (or you can choose to omit it, and increase the yogurt by 1 tbsp) and no olive oil!

Low-Fat Hummus
  • 15 oz can of chickpeas, drained (garbanzo beans)
  • 1/2 cup non-fat plain yogurt
  • 1 tbsp tahini (sesame seed paste) or peanut butter
  • 1 clove garlic, crushed
  • 1 tbsp freshly squeezed lemon juice
  • 1/2 tsp salt
  • 1/4 tsp chili powder (optional)
Combine ingredients in a food processor and blend until smooth. If you like your hummus a little thinner, add water by the teaspoon until desired consistency. Refrigerate left overs!

per 1 oz: 36 calories, o.8 g fat, 5.6 g carbohydrates, 1.3 g protein


Chocolate Hazelnut Biscotti (Low Fat)


Hello! This was supposed to be yesterday's post, but I couldn't get to it because there was no more sunlight for me to take a decent picture when I got back home. And by decent, I mean complete utter crap because I have those really old teeny weeny Olympus digital cameras from like, the year 2000, and truth be told, it takes about 30 SUPER-MACRO (yes, it's a must) shots to have one that's somewhat in focus. And then Blogger here decides to compact everything into this teeeeensy little picture which distorts the quality even more. So stick with me for now!

Did you know traditional Italian biscottis are made with no butter? A lot of "North American" brands nowadays sell them made with some kind of fat, so they're more of a cookie-type treat you can eat. These ones are authentic as well dippable, dunkable, and delicious!

Chocolate Hazelnut Biscotti makes about 24 biscotti
  • 1 2/3 cup all purpose flour
  • 1/2 cup unsweetened cocoa powder
  • 1 1/2 tsp baking powder
  • pinch of salt
  • 3/4 cup superfine sugar (you can put sugar in food processor)
  • 3/4 cup hazelnuts, shelled, and coarsely chopped
  • 2 large eggs
  • 1 large egg white (plus have one more handy)
Preheat oven to 375 degrees F. Line a cookie sheet with parchment paper and set aside.

Combine flour, cocoa, baking powder, salt, and sugar in a large stand mixer bowl and whisk together. Gradually beat in eggs and egg white. Mix in hazelnuts. If the mixture is too dry, add one more egg white and mix on low speed until a soft dough is formed.

Divide the dough into 3 and shape into loaves. Flatten to about 1/2" thick and place them on cookie sheet. Bake for 20 minutes.

When cool enough to handle, use a serrated bread knife to cut each of the loaves diagonally. You can decide how thick you want your biscottis. Place the cut biscottis face down on the cookie sheets (you might need to have two cookie sheets or do this in batches) and bake for 4 minutes. Flip them over and bake the other side for another 4 minutes. Cool completely before storing in an air-tight container. Enjoy!


Sunday, August 7, 2011

Carrot Oatmeal Muffins (Low Fat)


Good morning! :)

Since I'm on my last-two-weeks diet before Hawaii crunch (haw-haw we'll see how that goes), I decided to post another low-fat recipe! It prides me to say that these muffins can taste just as amazing with low-fat substitutions, and that you don't need those oily jumbo versions from the grocery store! The applesauce and shredded carrots in these muffins keep them so nice and moist. I've included some optional toppings in the recipe below. I chose the 'sweet & crunchy oat topping'!

The raisins are optional, and if you'd like you can even substitute with chopped walnuts. Yum!

Carrot Oatmeal Muffins (Low Fat) makes 12 muffins
  • 1 1/2 cups all-purpose flour
  • 1 cup quick-cooking oats
  • 1/2 cup brown sugar, lightly packed
  • 1 tbsp baking powder
  • 1/2 tsp cinnamon
  • 1/2 tsp grated ginger
  • 1/4 tsp salt
  • 1 cup skim milk
  • 1 egg
  • 2 tbsp vegetable oil
  • 2 tbsp + 1 tsp applesauce
  • 1 tsp vanilla
  • 1 carrot, grated
  • 1/2 cup raisins (optional) or 1/2 cup walnuts (optional)

Preheat oven to 375 degrees F and line 12 muffin cups with paper liners.

In a large bowl, whisk together flour, oats, baking powder, brown sugar, salt, cinnamon, and ginger. In a separate bowl, whisk together milk, egg, applesauce, vegetable oil, and vanilla. Pour over dry ingredients.

Sprinkle carrot and raisins or walnuts (if using) and stir with a wooden spoon until batter is just moistened (don't overmix!) Spoon into muffin cups (approximately 1/4 cup each) and sprinkle your choice of topping (listed below) if desired. Bake for 20 minutes until firm. Cool in its tins for 5 minutes before transferring to cooling racks.

Sweet & Crunchy Oat Topping
  • 2 tbsp brown sugar
  • 1/4 cup quick-cooking oats
Mix together in bowl and sprinkle on top of muffins before baking.


Crunchy-Cinnamon Topping
  • 2 tbsp granulated sugar
  • pinch of cinnamon
Mix together in bowl and sprinkle on top of muffins before baking.

Orange Glaze Topping
  • 3/4 cup icing sugar
  • 2 tbsp orange juice
Mix together in bowl and drizzle on top of muffins after they are done baking and completely cooled.

Saturday, August 6, 2011

Oatmeal Raisin Cookies (Low Fat)


Hey look! A low fat cookie!

There's something comforting about a chewy oatmeal cookie. And there's also something comforting about a low-fat chewy oatmeal cookie that tastes awesome. The original recipe from Skinnytaste was a chocolate oatmeal cookie, but I subbed it with raisin and added a dash of cinnamon to make it as healthy as possible. But add what you wish, this is a versatile recipe!

Oatmeal Raisin Cookies (Low Fat) makes 2 dozen cookies
  • 2 tbsp unsalted butter, softened at room temperature
  • 1/2 cup granulated sugar
  • 1/2 cup brown sugar, lightly packed
  • 1 egg
  • 1/4 cup unsweetened applesauce
  • 1/2 tsp vanilla extract
  • 1 cup flour, lightly spooned
  • 1 tsp baking powder
  • 1/2 tsp baking soda
  • 1/2 tsp salt
  • 2 cups quick-cooking oats
  • 3/4 cup raisins
  • 1/2 tsp cinnamon
Preheat oven to 350 degrees F and lightly grease 2 cookie sheets or line them with parchment paper.

In a medium bowl, whisk flour, baking powder, baking soda, salt, and cinnamon together.

Cream butter with sugars until light and fluffy. Add egg, and beat on medium speed. Add applesauce and vanilla extract, scraping sides of bowl and mix until smooth.

Working by hand, stir in flour and oats with a wooden spoon until incorporated and there are no streaks of flour. Fold in raisins. Drop cookies 2 inches apart by tablespoonfulls, flattening each one slightly. Bake for 10-12 minutes until centre is almost set and edges are golden. Cool on cookie sheets for 4 minutes before transferring to a wire rack to cool completely.

Friday, August 5, 2011

Cheesy Zucchini Enchiladas


A vegetarian twist on a classic Mexican dish! This was SO delicious and so easy to make! Got this recipe from Skinnytaste, and now I can't wait to try all the other enchilada dishes she has on her site. This one's a keeper for sure, I might even make it again for dinner tomorrow night. It was that good! :)

Cheesy Zucchini Enchiladas makes 4 servings, 1 tortilla wrap each
  • cooking spray
  • 1 tsp olive oil
  • 2 cloves garlic, crushed
  • 2 medium scallions, chopped
  • 1/4 cup cilantro, chopped
  • 2 medium zucchinis, grated
  • salt and pepper (to taste)
  • 1 1/2 cups grated reduced fat Mexican blend cheese
  • 4 large flour tortillas
  • chopped scallions (optional for garnish)
  • chopped cilantro (optional for garnish)

Enchilada sauce:


  • 1 garlic cloves, minced
  • 1 tbsp chipotle chili in adobo sauce (more or less!)
  • 1 cups tomato sauce
  • 1/4 tsp chipotle chili powder (to taste)
  • 1/4 tsp ground cumin
  • 1/2 cup fat free vegetable broth
  • salt and pepper to taste
First prepare the sauce: Spray a medium saucepan with cooking spray and saute the garlic cloves. Add chipotle chilis, chili powder, cumin, tomato sauce, and vegetable broth. Bring to a boil and then lower the heat. Simmer for 5-10 mins, season with salt and pepper to taste. Remove from heat and set aside while you prepare the enchiladas.

Enchiladas:
Spray a baking dish with cooking spray. In a large frying pan, heat olive oil over medium-high heat. Saute garlic and scallions, 4 mins. Add zucchini and cilantro, season with salt and pepper. Saute for 5 minutes. Remove from heat and stir in 1/2 cup cheese until creamy and melted.

To roll up enchiladas: Spoon 1/4 of zucchini mixture along the centre of the tortilla, roll the tortilla and place in baking dish with seam down. Repeat with remaining tortillas.

Spoon enchilada sauce over tortilla wraps and sprinkle with remaining cheese. Bake for 20 minutes until cheese is all melted. Garnish with chopped cilantro and scallions if desired.

Thursday, August 4, 2011

Triple Chocolate Cookies (Dark and Dangerous)


Oh yes.

TRIPLE chocolate cookies.

Dark.

Dangerous.

I'm not joking when I say I took a bite out of these, died, and then went to heaven. But hey, death by chocolate? It's not a bad way to go.

A decadent chocolate cookie base with dark AND white chocolate chunks. It doesn't get better than that!

Triple Chocolate Cookies makes 2 dozen cookies
  • 1/2 cup (1 stick) butter, softened
  • 1/2 cup granulated sugar
  • 1/2 cup brown sugar, lightly packed
  • 1 egg, room temperature
  • 1 tsp vanilla
  • 1 cup flour, sifted
  • 1/2 cup unsweetened cocoa powder, sifted
  • 1/2 tsp baking soda
  • 1/4 tsp baking powder
  • 1/4 tsp salt
  • 1/2 cup dark chocolate chunks, coarsely chopped*
  • 1/2 cup white chocolate chunks, coarsely chopped*
*you can substitute for semi-sweet and white chocolate chips

Preheat oven to 350 degrees F and lightly grease 2 cookie sheets.

In a large bowl, whisk together flour, cocoa powder, baking soda, baking powder, and salt. Set aside.

Using a stand mixer, cream butter with sugars until light and fluffy, scraping bowl once. On low speed, add in egg and vanilla. Beat until combined, scraping the sides of the bowl occasionally. Slowly add in flour mixture until well combined.

Fold in chocolate chunks with a rubber spatula (or your hands!) until just combined. Drop cookie dough by tablespoons about 2" apart on cookie sheets.

Bake for 10-12 minutes, cool on pan for 5 minutes before transferring to a wire rack to cool completely.

I dare you to have these with a glass of chocolate milk. ;)

Wednesday, August 3, 2011

Homemade LÄRABARS


When I made a trip to Save-on-Foods yesterday morning, in hopes of avoiding a coffee run at Starbucks (to save me some moola) I ended up spending more than $8. Why? Because a display of Larabars at the pharmacy caught my eye, and I just had to try three different flavors. Wasn't planning on inhaling all three (I'm pretty sure that's not good for you) but that's what happened on my walk to school.

I was comforted by the ingredients though; all-natural, wholesome, purchasable ingredients. Some only had 3 or 4; all were date-based, with raw nuts, and chocolate or other types of dried fruit or seeds. I could understand why exercise fanatics and yoga gurus enjoyed these bars, but hell, why were they so expensive? They were about $2.50 a piece at Save-on-Foods, this couldn't be justified! On my way back home, I stopped by again at Save-On and brought home some bulk dates and raw cashews, searched up some recipes at home, and welcomed this Homemade Larabar into the world! It's so easy to make and so delicious, extra-chocolately too for me ;)! I'm never going to pay that much for an energy bar again.

There are two flavors I made; chocolate chip cookie dough and peanut butter cookie. I didn't take a picture of the peanut butter one but the recipe is down below as well!

They make great lunch-mates and friendly gifts for that on-the-go exercise fanatic ;) *hint- if someone were kind enough to make ME some Larabars...I'd keel over in happiness*

Enjoy!

Chocolate Chip Cookie Dough Larabar makes 10 Larabars
  • 1 lb pitted prunes, about 3 1/2 cups
  • 1 cup raw cashews (other nuts such as almonds or walnuts work too)
  • 1/3 cup chocolate chips
  • 2 tbsp unsweetened cocoa powder
  • 1 tsp vanilla extract (optional)
  • 1/4 tsp salt
Line an 8x8" baking dish with parchment paper.

In a food processor, grind the nuts into a coarse meal. Put in a medium bowl and set aside. Using a food processor, pulse the dates (you will know when it is ready because it will form a ball inside your food processor). Add dates to the ground nuts, and add rest of ingredients.

Using your hands, mix dates with nuts and other ingredients well. (You will get your hands super sticky!) Press mixture into prepared pan, cover with plastic wrap, and refrigerate for 1 hour.

Remove the "LARABAR" from the pan (with parchment paper) and place on cutting board. Using a sharp knife, cut into 10 bars (1 cut down the centre of square and 5 cuts across to make 10) or desired amount. Wrap individually with parchment paper or plastic wrap. ENJOY!

Peanut Butter Cookie Larabar
  • 1 cup pitted prunes
  • 6 tbsp smooth or crunchy peanut butter
  • 1 1/2 cups roasted peanuts
  • 1/2 tsp vanilla extract
  • 1/4 tsp salt
Same procedure as above! Grind nuts, grind prunes...add prunes to nuts along with peanut butter, vanilla extract, and salt! These ones are my favourite so far!

Tuesday, August 2, 2011

Raisin Cinnamon Irish Soda Bread


Thank you to whoever came up with Irish Soda Bread! If there's anything about baking that I will probably suck at for a really long time, it's dealing with yeast and making yeast breads. It just takes so long, is extremely tedious, and the results I get are crappy no matter what I do. :(
This recipe just gave me hope in being able to have delicious yeast-like bread without the yeast! I can't believe what an amazing job the baking soda did, the loaf was crusty on the outside and very soft on the inside. It's SO EASY to make, even for beginners! Great for breakfast, but if you're looking for some bread to serve with dinner, just omit the sugar and cinnamon, and replace the raisins with some seeds (sesame seeds, caraway seeds, or ground flax works awesome)

If you can't tell by the picture, the loaf was about the size of my head. I wasn't confident when I put it in the oven, since it started out the size of a softball, but boy did it rise!

Raisin Cinnamon Irish Soda Bread (Low fat) makes 1 loaf, 15 slices
  • 1 1/2 cups all purpose flour
  • 1 1/2 cups whole wheat flour
  • 1 1/2 tsp baking soda
  • 1 tsp salt
  • 1 tsp cinnamon
  • 4 tbsp sugar
  • 1 1/2 cups 1% buttermilk
  • 2/3 cup raisins
Preheat oven to 375 degrees F, and line a cookie sheet with parchment paper.

In a large bowl, combine all dry ingredients (first 6) with a whisk. Slowly add buttermilk, stirring with a spoon until a soft dough is formed. Fold in raisins.

On a floured surface, knead the dough for 1 minute. Shape into a round and slightly flattened ball. Using a sharp knife, make an 'X' at the top of the dough (about 1/2" deep). Bake for about 40 minutes until golden. You can test the doneness by inserting a toothpick in the centre of the loaf, if it comes out clean it's done! Let it cool on a wire rack for 5-10 minutes before slicing. Enjoy! :)

per slice: 125 calories, 0.5 g fat, 27 g carbohydrates, 3.8 g protein