Monday, October 31, 2011

Brownie Batter Pancakes & Insight into a new month!

sorry for the rushed pic, was on my way to work!

Warning: These pancakes are not for the faint-hearted!

I wish I had a Halloween post, but I've been sick all day (vomiting, sleeping, attempting to eat, and vomiting again...) and just never had the energy to get into a festive spirit.

So I bring you healthy chocolate pancakes from CCK that also happen to be vegan! These are single serving, and make about 6-7 silver-dollar pancakes. They're also only 130 calories per serving so you can have other breakfast goodies or go all-out on the toppings. For a healthier chocolate syrup, try whisking some cocoa powder with agave!

Brownie Batter Pancakes serves 1
  • 1/4 cup flour (I used whole wheat, though all-purpose probably will taste better)
  • 1/4 tsp baking powder
  • 1-2 tablespoon cocoa powder
  • 1/16 tsp salt
  • 1+ 1/2 tablespoon applesauce (or oil)
  • 1 tsp vanilla extract
  • 1/4 cup + 1 tablespoon almond milk (or other nondairy)
Mix dry ingredients together, mix wet ingredients together, and combine the two! Perhaps add some mini chocolate chips? Make pancakes!


November month:
It's been quite a long October on this vegan diet and though it took some getting used to in the beginning it's pretty easy to live with. In some ways, it is pricier (nondairy milks are a lot more expensive...) but otherwise you don't have to purchase any of those "extras" such as yogurts or countless dairy containing products and goodies (muffins, cookies, etc). Oh and tofu's pretty cheap too. But cost-aside, I got to taste some vegan alternatives like SOY CHEESE and let me tell you, I did not like it at all haha! There's still half a block in my fridge for any grabbers out there! Being a vegan did make me feel hungrier most of the time, since all I was eating mostly veggies and lacking in the protein department when I didn't have my tofu or beans.

November: I'll be exploring a high-protein diet made by expert New York fitness coach, David Kirsch. He has worked with numbers of actresses and models such as Heidi Klum and Liv Tyler, and is well known for his quick methods of getting into shape! I read one of his books called "Sound Mind Sound Body" which consisted of a 6 week nutrition and work-out plan, which I followed loosely and actually lost about 10-12 lbs from! This guy knows what he's talking about! I'll be revisiting the high-protein diet in hopes of curbing hunger daily and effectively exercising. His work-out plans were always fun and they make you feel awesome. :) I'll be posting more info hopefully tomorrow when I get more time. For now, I'm off to bed to try and sleep this tummy ache off! Happy Halloween!

Friday, October 28, 2011

Blueberry Buckle


Try this easy blueberry buckle for a lazy weekend brunch, or a quick-fix when last minute company is coming over! You can use fresh or frozen blueberries (I still have mine from the summer) to make this moist cake, and feel free to add to your streusel topping! Maybe walnuts? Oats? Pecans?

I veganized this recipe but the original ingredients from Becky Bakes is in parenthesis.

Enjoy with a cup of coffee or tea! :)

Blueberry Buckle

Streusel:
  • 1/3 cup sugar
  • 1/2 cup flour
  • 1 tsp cinnamon
  • 1/4 cup Earth Balance (or butter)
  • 1/4 cup sliced almonds
Cake:
  • 2 cups flour
  • 2 tsp baking powder
  • 1/2 tsp salt
  • 3/4 cup sugar
  • 1/4 cup Earth Balance (or butter)
  • 1 *flax* egg = 1 tsp ground flax + 3 tbsp water (or 1 egg)
  • 1 tsp vanilla
  • 1/2 cup almond milk (or milk)
  • 2 cups blueberries (or other berries, perhaps?)
Preheat oven to 375 degrees F.

Topping: Mix sugar with flour, cinnamon, and almonds. Cut or rub in butter with a pastry cutter or knives until crumbly. Set aside.

Cake: Combine flour, baking powder, and salt. Cream the butter with sugar, egg, and vanilla. Alternately add the milk and flour mixture, ending with the flour mixture. Don't over mix. Fold in blueberries.

Pour in a greased and floured 8" square cake pan. Sprinkle topping over the cake. Bake for 40-45 minutes until toothpick comes out clean.

Thursday, October 27, 2011

Self-Frosting Peanut Butter "Cup"cakes (the best cupcakes I've ever had)


It's uncharacteristic of me to rank something #1 immediately, but I know for sure in a moment when something surpasses all others. I made these cupcakes quite spontaneously after school yesterday to surprise my dad as an early birthday gift, since he's leaving town tomorrow. Cupcakes are easy to make, they're quick, cute, convenient, and make great gifts. I never expected them to taste THIS good. My brother taste-tested one and actually asked for another (I told him 'no' because we had to bring them to my dad). My MOM even told me they were delicious and requested I make them again...SOON (she's my harshest critic, by the way).

When it comes to cakes and cupcakes, there are two kinds of people in this world. Cake people, and Icing People. The Cake people (me) will usually leave dollops of icing on the side of their plate or scrape it off entirely and gladly eat the cake itself. The Icing people are the people who eat the icing by the spoonful! This cupcake, self-frosting, means that the icing gets baked with the cupcake so it looks like its swirled inside the batter and incorporated, but as soon as you take a bite, you get the chocolatey-peanut butter frosting still really gooey, smooth, and icing-like! It's like the baddest cupcake in the world had a love child with the yummiest frosting.

Maybe it's because I'm a die-hard fan of anything with peanut butter + chocolate, but I'm almost certain my opinion isn't biased. These are seriously amazing. A moist peanut butter base with swirls of sweet chocolate-peanut butter FROSTING. Go make yourself a batch. Right now. You can thank me later!

Did I mention they're vegan? I swear on my life NO ONE will be able to tell.

Self-Frosting Peanut Butter "Cup"cakes makes 12 cupcakes
From the cookbook My Sweet Vegan, Hannah Kaminsky

Frosting:
  • 2/3 cup icing sugar (powdered sugar)
  • 1/2 cup smooth peanut butter
  • 1/4 cup cocoa powder
  • 1/4 cup + 2 tbsp soy milk (I used almond milk, you can use dairy)
Cupcake:
  • 1 1/2 cup all purpose flour
  • 1 tsp baking powder
  • 1/2 tsp baking soda
  • 1/2 tsp salt
  • 2/3 cup soy milk (or other milk)
  • 1 tsp vinegar
  • 1/2 cup brown sugar
  • 1/2 cup sugar
  • 2 tbsp ground flax seeds*
  • 1/4 cup water*
  • 1/2 cup smooth peanut butter
  • 1/2 cup apple sauce
  • 1/2 tsp vanilla extract
*flax seeds and water are replacements for eggs. You can try using 1 egg to replace (not vegan) and tell me how it works? :)

Preheat oven to 350 degrees F and line 12 cupcake tins with paper liners.

Using a stand mixer (or food processor) mix/blend frosting ingredients until smooth. The consistency should be like Nutella. Set aside.

Combine flour, baking powder, baking soda, and salt in a medium bowl.

In a small bowl, whisk flax seeds and water, set aside. In another bowl (stand mixer) mix soy milk with vinegar and let stand until frothy. Beat in sugars. Beat in flax mixture. Add peanut butter, applesauce, and vanilla extract and mix until incorporated. On low speed, slowly add the flour mixture until smooth. Using a standard ice cream scoop (1/4 cup measure), scoop batter evenly into 12 cupcake tins. Add about 2 tbsp of peanut butter-chocolate frosting on top and swirl into batter using a toothpick.

Bake for 22-25 minutes. Let cool for about 10 minutes before cooling completely on a rack. To test doneness, you can check by inserting a toothpick (not into the icing part) to see if it comes out clean from the cake (the icing will always stay gooey!) Enjoy!!

(Oh and try not to eat the batter or frosting BEFORE it goes in the oven? You'll be in serious trouble once you start....) ;)


Monday, October 24, 2011

Dance soothes my soul...and so does this Sweet Potato Soup!

This cake is ACTUALLY a deep and beautiful autumn orange colour, but you know how my camera is...


Dance today was alright for the most part- all work for my first two classes, but my last one was interesting because we have a sub right now, her name is Miss Thies and she is amazing. Although she talked for most of the class and I had a very hard time grasping her concepts, she's really really knowledgeable about the anatomy of dancers, different muscles, etc so it's awesome to have her around because you can ask about your body. And if something hurts, there's a 99% chance that she can fix it. I've seen it happen! I've had it happen! She always has some kind of hands on method to strangle your leg or foot in a way that just HEALS it, I swear, it's like witchcraft. This one time she straddled a girl's leg and like, shook it so violently while dropping it on the floor multiple times, and shaking it again...and after a few repetitions of that...I, and 15 other witnesses SAW the girl's leg actually grow longer than her other leg. It was NUTS. So of course, Miss Thies had to do the same to the other leg to even it out. I was a skeptic until that moment.

We had an audience today but we weren't doing much dancing, just a whole lot of talking and listening. At the end though, she split us into two groups, put on a Josh Groban tune and told us to do a minute and half of improv on the spot. Wait, what!? In front of an audience!? First of all, ballet teachers never EVER do this. Everything is very structured in a ballet class, everything is taught the way it is supposed to be taught- you don't make things up on the spot...I was absolutely TERRRRRIFIED to get up there. I totally thought I was going to blank out on the spot but kind of took it on a more positive level and pretended like no one was judging me. And guess what? I never thought I would enjoy the experience but it was so liberating to just listen to your body and what it wanted to do with the music. I just wanted it to go on forever. The rush...the freedom...and the courage it took to get out there and just DANCE was an extremely satisfying experience. A parent even came up to me after and told me it was beautiful! :)))

Anways- this soup...it tastes SO good on these chilly nights where you want something light but filling! I like my soup two ways, either chockful of veggies and so chunky it's a stew, or pureed like baby food. This is the pureed kind and it's absolutely wonderful. So smooth and creamy without cream! Non-vegans, you can serve this to your guests with a small pitcher of cream if you want that extra-richness, but I personally think it tastes just as wonderful all by itself.

This sweet potato soup is garlicky and lemony with aromatic hints of fresh rosemary! It tastes like YAM FRIES in a bowl.

Sweet Potato Rosemary Soup (Vegan and Gluten Free) serves 4
  • 1 large sweet potato (750 g), peeled and cubed
  • 1 onion, roughly chopped
  • 2 cloves garlic, chopped
  • 1 sprig of rosemary, leaves only
  • zest of half a lemon
  • 1 cup vegetable stock
  • 2 cups water
  • 2 tsp olive oil

    In a medium stock pot, heat oil over medium heat and cook onions, garlic, and sweet potato for 5 minutes. Add rosemary, lemon zest, stock, and water and let simmer for about 30 minutes or until vegetables are softened. Transfer to a food processor or blender (you may need to do this in batches) and puree the soup until smooth. Strain soup over a sieve and serve! Enjoy!!

Saturday, October 22, 2011

Falafel-Inspired Veggie Burger


Hello! I've been so busy lately, it seems like there's not even enough time to cook, yet alone have the patience to take pictures and blog about it. Well, this is what I had for dinner last night- a chickpea burger! It tastes like a falafel, minus the deep fryer! It's great with a slather of tahini on top and a couple of cucumber slices too. It's super easy to make, all you need is a food processor or blender!

A little more than a week until my vegan month is over, and I'm still not missing meat, but I do envy those ice cream and chocolate-eaters lined up at the Purdy's...and I will definitely not miss the miso-soup consistency coffee ;)

Eating vegan is really no different than eating vegetarian, except you really have to watch what has eggs/dairy in it, and sometimes that can be hard (and teasing!) A lot of the time, I would have to turn down many different kinds of cereals or snacks at the store because they have "modified milk ingredients".

I'm still thinking about what November's going to look like but I'll keep you posted as soon as it's decided!

In the meantime, enjoy this veggie burger if you can! It's super healthy, easy to make, and great for the non-tofu-eaters. And if you like middle eastern food, hey, it's perfect for you!

Falafel-Inspired Veggie Burger makes 4 patties

  • 1 15-ounce can chickpeas (1 1/2 cups), drained and rinsed
  • 1 yellow onion, finely chopped
  • 3 cloves garlic, minced
  • 1/4 cup chopped fresh parsley
  • 2 tablespoons tahini
  • 1 1/2 to 2 teaspoon ground cumin
  • 1 teaspoon ground coriander (I omitted this)
  • 1/2 teaspoon salt
  • 1/8 teaspoon freshly ground black pepper
  • 1/4 teaspoon cayenne pepper
  • 1 teaspoon lemon juice
  • 1 teaspoon baking powder
  • 1 cup plain bread crumbs
Heat oven to 400 degrees F. Lightly grease a cookie sheet or line with parchment paper.

Pulse chickpeas in a food processor or blend in a blender until smooth. Transfer to a medium bowl. Add rest of ingredients (except bread crumbs) and mix until combined. Slowly add breadcrumbs until the mixture holds together, you may need more or less. Shape into 4 patties on the cookie sheet and bake for 10-12 minutes. Flip patty and bake another 10-12 minutes on the other side. Alternatively, you may fry this in a frying pan with a little bit of olive oil. Serve on buns or pita pockets!

Wednesday, October 12, 2011

Yes, you can eat a bowl of cookie dough! Chocolate Chip Cookie Dough Dip= Heaven.

Oh sweet mother of pearl...

Hey! Long time no blog, hope you all had a great Thanksgiving! I had a rather busy one cause there was lots of homework for me to do! I'm still catching up in school after missing two full days at a retreat...

For the next few days I'll be posting some old recipes (by old, I mean I had them planned out for blogging but never got around to doing it) from last week because I'm off food for the next 2 days! What!? You're not eating?!

Nope!

Are you crazy!?

Nope! Well maybe just a little, but right now I'm just about completing my 30th hour without food because I am doing a 80 hour juice-detox. Sounds a little nuts, but I'm doing it in hopes of restarting my system a bit after this hectic long weekend. I haven't been eating TOO well for the last 2 weeks, and this long weekend just totally put my body in shock. So much food! Like, all the time! At strange times! At unworldly intervals! Basically, I've just been feeling sluggish and really weighed down so it's time to restart on a clean slate. What is a juice detox? Some people call it juice fasting, others call it juice feasting...but I don't really think I'm doing either. I just drink fruit and veggie juices in lieu of my meals, and when I feel hungry... It's not quite starving yourself because you are still getting nutrients from the juice, but the whole point of the detox is that your body is not spending energy breaking down food fibers and metabolizing foods, but using that energy someplace else, such as detoxifying! A juice fast/detox is followed by a period where I will slowly regain a stability by eating raw and minimally processed foods. I started yesterday evening at 5:00! Today was a bit hard, but it's always the first day that's the most painful. I'm not feeling hungry at all right now, although my body is fatigued.

Anyways! I need to tell you about this FANTASTIC recipe. Yes, I know you're probably wondering "Why on earth would you eat a bowl of cookie dough!?" well I ask you, "Why wouldn't you?!" It's absolutely delicious, but I didn't dare use the "H" word in my title to scare all of you away (the H word being Healthy). Honestly, how can eating chocolate chip cookie dough be possibly healthy!? You're about to find out!!

This recipe is from Chocolate Covered Katie, my new FAVOURITE blog EVER. It's a vegan dessert blog, but here's the catch, everything she makes is HEALTHY (there's a difference between low fat, sugar-free, reduced-calorie and HEALTHY) and although I'm always skeptical at first to try the daring recipes, they are SO delicious!!!!!

This cookie dough is meant to just be eaten by spoonfuls- I did just that, but also threw in a plateful of pretzels to use as a cookie dough dip! So yummy! It works well with all kinds of fruits too like apples or strawberries. It's great for the kids! Everyone loved them at our Thanksgiving dinner! What's in the cookie dough? Obviously not raw eggs or flour, but what makes it healthy and gives it that gooey cookie dough foundation are chickpeas. I know, but PLEASE take this with an open mind and if you have a can of chickpeas at home PLEASE try this recipe! You will not be disappointed! You can't taste the chickpeas at all, they are such neutral-flavoured beans, but it gives it just the perfect cookie dough texture! All you need is a food processor or blender!

Beans are actually my favourite things to bake with right now, when I want to make something sweet but healthy. I've used chickpeas in baking blondies, snickerdoodle bars, and brownies so far! The results are flawless! :) So go ahead! Make the cookie dough, and check out CCK's blog for other variations such as Brownie Batter Dip, or Snickerdoodle Dip.


:D

Healthy Chocolate Chip Cookie Dough Dip
  • 1 1/2 cups chickpeas, rinsed and drained
  • 1/4 cup nut butter (I used peanut butter)
  • up to 1/4 cup non-dairy milk (start with adding 1 tbsp at a time, until desired consistency)
  • 2/3 cup brown sugar (you can get away with subbing a part of this with sweeteners or Splenda)
  • 2 tsp pure vanilla extract
  • 1/8 tsp baking soda (I omitted this)
  • pinch salt
  • 1/4 cup oats (optional, but so good with it!)
  • 1/3 cup chocolate chips (vegan chocolate chips if you are vegan...)
Add everything except chocolate chips into a food processor or blender and blend until smooth, adding the milk by the tablespoonful until you have a desired thickness. Blend until chickpeas become a smooth mixture. Stir in chocolate chips. There you go! Now, don't say I didn't warn you- try not to eat the whole bowl!

What are some other ways of eating this? Why not spread it on toast for breakfast? Blend it with soymilk (or regular) for a cookie batter milk shake? Sandwiching it between cookies? Crackers? There are so many ways but seriously, do what I did first- just eat it by the spoonful...

Wednesday, October 5, 2011

Curried "Egg Fried Rice"- 5 Minute Vegan Dinner


I usually cook my dinner the night before if I have dance the next night, so I like making something super light and quick- usually a salad. Salads usually won't keep me going for 4 hours so I'll usually grab a protein bar and I'll be good to go BUT I JUST FOUND OUT TODAY that the protein bars I eat have milk ingredients in them. WHY!!! So in comes Plan-B: 5 Minutes Dinner fixes that are super easy to make, super healthy, and super filling. Superrrr!

The title is in quotations not to trick you into thinking this is some faux-egg or faux-rice because it's not, it's NOT real eggs or rice, it's just better. :D

Quick veggie lesson here: Cauliflower, among brocolli, arugula, kale, and cabbage are a part of the vegetable kingdom categorized as "cruciferous vegetables". Cruciferous vegetables have excellent cancer-fighting properties, and they help our bodies break down potential carcinogens. Cruciferous veggies also help reduce stress, are full of vitamins and minerals, and phytochemicals. They also have a lot of fiber, and keep you feeling full for a long time! It's suggested to sometimes skip the bread or potatoes at dinner and just have some broccoli or cauliflower!

In this recipe, the the 'egg' was actually tofu, and the 'rice' were cauliflower florets! It was super easy to make, and delicious too! Besides, who needs all that carb anyways?

5 Minute Curried Egg Fried Rice serves 1 hungry dancer, or 2 as a side dish :)
  • 1 tsp extra virgin olive oil
  • 1/8 package (about 6 oz) smooth tofu
  • 2 cups cauliflower florets
  • 1/2 cup frozen vegetables of choice
  • 2 tsp curry powder (more or less to suit your taste)
  • 1/2 tsp cumin
  • salt and pepper to taste
Using a food processor, pulse the cauliflower florets just a few times to make it into fine little pieces.
Heat the oil in a frying pan over med-high heat. Saute the tofu with the frozen vegetables, breaking the tofu with wooden spoon to resemble 'scrambled egg' texture. Add cauliflower and season with curry powder, cumin, and salt and pepper. Cook for another 2 minutes.


Tuesday, October 4, 2011

Ratatouille- A Hearty Vegan Stew!


It's only been three days, but I can really feel the 'veganism'. It's not too drastic of a change to what kind of foods I've been eating before, but it is a little bit different.

It hasn't been too bad at all, really! There are inconveniences, but they're all tolerable. I'm just having a little trouble reminding myself that I can't have yogurt for breakfast, or milk in my coffee.
I found out today that soy milk does not sit well in my coffee mug- it begins to separate and then it looks like miso soup! The taste is quite bean-y also, but nothing too terrible. I'm guessing almond milk would be better, but we ran out yesterday! Oh, did I mention that I also get some special treatment at Starbucks? I love all their soy subbed drinks, in fact, if it wasn't for the extra $$ they charged for their soy I'd be getting soy lattes and cappuccinos all the time! Back when I had a steady retail job I could afford to get an order of flavoured steamed soy. I KNOW-it may sound weird and pretentious but if you like soy milk and don't mind spending $3 for hot soy milk....you should try it. Ask for "steamed soy with a shot of ______". My favourite syrup shots were raspberry (this turns your soy milk pink :D), peppermint (weird combo but so tasty), hazelnut (ask for sugar-free), and of course chocolate. Okay okay I'm rambling, but the point is soy milk is amazing but it is usually overpriced to sub. But instead, when I get my Earl Greys or coffees, I just ask for them to put soy 'on the bar' and they automatically know I'm vegan (or maybe lactose intolerant) and they're really nice about it! They just give me the whole carton of soy so I can add however much to my drink. Awesome. :)

Also, when they say veganism is 'cleaner eating', they're not lying. And they're also not just talking about the Earth. Well, so far for myself, I've noticed that the restrictions are really keeping me balanced and aware of what I was eating. I notice that I try to snack less now, and also because I'm eating so healthily with so many veggies, it's given me motivation to maintain a good exercise routine again!

Anyway, about this recipe- I came home Sunday night from work exhausted and my mom had this on the table! I love this ratatouille. She makes it occasionally, and it is just so great to have on a cold night! A steaming bowl of stick-to-your-ribs stewed veggies and a slice of rye bread is the perfect dinner to leave you toasty and full. Ratatouille is very low-fat, and quite versatile. We add chickpeas to our ratatouille for some extra fiber and protein!

It's super simple, so if you're looking to make a quick, healthy, and delicious weeknight dinner for the fam, this is it!

Ratatouille serves 4-6
  • 2 tbsp olive oil
  • 4 cloves of garlic, minced
  • 2 onions, diced
  • 1 large eggplant, cubed
  • 2 bell peppers, chopped
  • 4 small zucchinis, cubed
  • 4-6 large tomatoes, coarsely chopped or 1 can (796 ml) diced tomatoes
  • 1 can (594 ml) chickpeas
  • 1/2 tsp oregano
  • 1/4 thyme
  • 2 tbsp chopped fresh basil
  • salt and pepper
Heat oil over medium heat in a large saucepan or medium pot. Add garlic and onions, cook until softened. Add eggplant and peppers. Add tomatoes and herbs, cook for 20 minutes stirring occasionally. Add chickpeas and zucchinis, cooking for another 10 minutes. Finally stir in the fresh basil, and season with salt and pepper to taste.


Coming soon! Wonderful recipes with TOFU (seriously there's nothing this magical food can't do...) and also some Vegan Thanksgiving recipes!

Friday, September 30, 2011

Vegan Day 1: Strawberry Banana Pancakes


Happy October everyone!

Today is the first day of my 31 days as an experimental vegan! New beginnings and habits means jump-starting everything into gear! I went for the regular 4.5 km run around the lake first thing this morning, and then went swimming after breakfast! Felt awesome!

So before we officially kick-start this 12-month journey, let's look at some physical statistics concerning mon corps :$ (saying it in another language is supposed to make it less embarrassing...)

Mary- October 1, 2011
Height: 5'4
Weight: 107.6 lbs
Classified: Active
BMI (Body Mass Index): 18.47
RDI (Recommended Daily Intake): 2100 cal
Average Daily Intake: 1200-1400 cal

Details:
The ideal weight for a female my age and body figure is 117 lbs.
At the beginning of summer, I weighed 122 lbs. Through exercise and eating well, I dropped my weight to 105 lbs. At this time however, I started experiencing some health problems! Being underweight gave me regular nausea, fatigue, and lightheadedness, so I was told to stop running and exercising for a while, and to try to regain some weight! I gained 2 lbs while vacationing in Hawaii :D

Okay now that's OVER and DONE with, let's get back to pancakes! I had originally wanted to start off my day with a seasonal pancake recipe, like a sweet maple-pumpkin but summer was on my mind and this recipe just seemed too good to pass up. This is an adapted version of a recipe from ChocolateCoveredKatie.

I just love the combination of Strawberry Banana, and it's a genius idea to have it in a pancake! You can easily change it to a 'Blueberry Pie' version- just sub for blueberries, and add 1/2 tsp of cinnamon! I used thawed frozen berries and it turned out fine!

The recipe below is single-serving but you can easily double/triple/quadruple it for your whole family! :)

Strawberry Banana Pancakes serves 1 person!
  • 1/2 cup chopped strawberries
  • 1/3 cup whole wheat flour
  • 2 tbsp rolled oats
  • 1/2 tsp baking powder
  • 1/2 tsp baking soda
  • 1/8 tsp salt
  • 1/2 tsp pure vanilla extract
  • 1 tbsp sugar or sweetener (optional)
  • 1/3 cup nondairy milk
  • 1/2 cup banana, mashed
Combine all ingredients except strawberries together in a bowl. Pour a spoonful of batter on a slightly oiled pan over med heat, plop some strawberries on top and cook. Flip the pancake when you see bubbles.


"The BEST Chocolate Chip Cookie"? Batch #1


I had some fun in the kitchen last weekend! When there are infinite variations of a classic recipe (such as the chocolate chip cookie) with so many that claim to be "the best", you've just got to try them all right!? I'm on a search for the BEST chocolate chip cookie out there! In total, I've chosen 4 different recipes that claim to be the best. Let's review what makes a great chocolate chip cookie:
  • slightly crispy outside with a fluffy inside
  • soft chewy texture
  • right sweetness of dough
  • LOADS of chocolate chips!
Our first batch is Thick and Chewy Chocolate Chip Cookie from Baking Illustrated, p. 434. You can also find the recipe here http://www.browneyedbaker.com/2008/06/21/thick-and-chewy-chocolate-chip-cookies/. Its claim to fame? An oversized thick cookie with the perfect crispy-chewy ratio. The secret ingredients that make this just that is the extra egg-yolk and melted-butter method instead of the cream-butter method.

The result? A beautiful chocolate chip cookie that spread nicely and evenly while baking! The edges were slightly crispy (could have baked for a TAD bit longer) and it was definitely chewy when cooled completely. The vanilla accent was a bit strong for me, but you like that in your cookie, then the dough was perfect! It tasted so good my mom's already betting on this to be the best recipe out there! The recipe got a total rating of 8.5/10.

Recipe: Thick and Chewy Chocolate Chip Cookie from Baking Illustrated, p. 434
or click the title to go to Brown Eyed Baker.

I will be putting this cookie-hunt off to the side while I venture off into the vegan world tomorrow for a month! Stay tuned!

Bought some non-dairy milk and tofu to kick-start vegan month for tomorrow! (what looks like illegal substances in the bags is actually whole wheat flour and pearl barley)

Wednesday, September 28, 2011

What is Veganism?

What is veganism and why do people follow this diet?

We've already established that veganism is a diet where absolutely no animals or animal-byproducts are consumed. Very simply, there is no meat or fish, eggs, or dairy. Seems quite simple doesn't it? That's what I said too!

"Oh that means I'll just start subbing for soy in my latte, sub the sunny side up, and give up my sushi (*yelp!*)"

When it comes down to how many FOOD PRODUCTS contain the restricted foods however, it shines in a different light and does seem quite challenging. Some common foods that contain eggs or dairy include (some will seem obvious):
  • Mayonnaise (made of eggs)
  • Whey protein
  • Some pastas
  • Some breads
  • ice cream and yogurt
  • CHEESE!
  • Butter (considering myself as a baker, this is a HUGE deal! Although butter can be substituted, it is a staple ingredient in most baked goods such as pastries, pies, cookies, cakes, breads, etc)
I'll miss the baking but I'm excited to try vegan baking and recipes as well!

So why veganism? Why do people do it?
There are two main reasons, one is ethical and environmental and the other is for health-related purposes. Environmentally, a vegan diet is kinder to the Earth.

How is it good for your body? Going back to Science 10 ( ahh!) we learned about the trophic pyramid and transfer of energy from one trophic level to the next. We learned that foods that have a higher trophic level receive less and less of the initial energy that comes from foods on the 1st trophic level. People believe that by eating foods on the primary trophic level (plants and veggies) will give them the most energy, and will result in cleaner and more efficient eating and use of that energy. Vegans claim that they are more abundant in energy, and have a very little amount of toxins in their body.

If you want to learn more, you can go to www.vrg.org or if you are interested in some vegan foods and how they vary or differ, you can visit some of my favourite vegan blogs:

www.chocolatecoveredkatie.com
www.ohsheglows.com
www.veggie101.com
www.blog.fatfreevegan.com

Enjoy! :)


Tuesday, September 27, 2011

Ultimate Revealing: The 12 Month Diet Experiment

Hey guys! It's almost October so I thought it was time to finally lay out this crazy idea on you. This is a 12-month (year long) experiment that I am conducting on myself. I came up with this idea during the summer. It may sound crazy, and I may be a little nuts, but diets and basically different kinds of foods just really interests me. Now before I explain, let us review that the word diet does not necessarily mean 'an eating plan with restrictions in order to minimize calorie intake and lose WEIGHT'. No no...

diet, noun: the foods eaten, as by a particular person or group.

It's as simple as that.

I don't know why, but I've always been fascinated by the different types of diets out there that millions of different people follow, and the effects that it has on the body. Why do they do follow that specific diet? What effects does it have on your body; Your mood? Your energy levels? Metabolism? I'm about to find out!

Also, the cooking component REALLY appeals to me too! Did you know that in my free time (the time that swings by ever-so-rarely) I like walking in grocery stores and markets and just looking at the different kinds of produce there is!? LOL Yeah it's silly.

Okay. This experiment comes down to this, it's quite simple, and I hope that I can overcome the challenges that come with it and my body can take it till the end. I won't risk my health for it, so if there ever comes a time where it's harming me for some reason, I'll stop.

The 12-Month Diet Experiment:
I have done my research on a WHOLE list of diets that people follow in the world, whether culturally, ethically, or for the well-being of their body, and I have chosen 12 from the list.

I will follow and abide the rules and restrictions of a different diet per month. I will cook for myself following those rules and restrictions. I will only eat the foods allowed by that specific diet for the whole month.

While doing so, I will post those diet-friendly recipes that I find or like on this site so maybe you can try the foods out for yourself! The posts will probably not be regular, but hopefully I'll have enough time to post a recipe weekly.

Not only will there be recipes posted, I will be recording every single aspect and effect that it has on my body/mind. At the end of the month, I will do an overall summary of the toll it had on my body and a physical calculation as well. Loss or gain of weight?

I won't list the 12 I've chosen, but here's a teaser list of some of the ones I hope to be experimenting with.

  • Raw Diet
  • Gluten-Free
  • Mayo Clinic
  • Hollywood Cookie Diet
  • Low-Carb
  • Atkins (if I can get over my squeamish feelings of meat...I am curious though)
  • Ballerina diet

So what will I be starting with in October? Well, it is a diet that I've been most curious about for the last couple months, and vaguely following it too! Now I'm excited to immerse myself into it completely and see what kinds of effects it will bring! October is...

Veganism Month.

vegan: a strict vegetarian who consumes no animals, dairy products, or any animal-byproducts. Also may refrain from using any animal products such as leather.

In a nutshell, they are not allowed to eat anything that comes from an animal. No meat, no eggs, no milk. We'll see how I do!

Currently reading: The Accidental Vegan by Devra Gartenstein


Note: If you guys wiki "list of diets" and go through the list, you'll be amazed at how many different kinds are out there. There are some REALLY crazy and outrageous ones too! I couldn't believe some of the ones I saw- and people actually follow them!

Sunday, September 25, 2011

Garlic Potato Wedges


Hello, hello!

Long before being educated on my food groups, daily intakes, serving sizes, and taking up my interest in healthy wholesome foods...I was an innocent and oblivious pig-tailed little girl. If you asked my 6 or 7 year old self what her favourite food was, she would have answered "potatoes!"

Remember those SMILEY FACE potatoes? Those were the days...

Anyways! Back to the recipe! These are exceptionally good fries- crispy, garlicky, and you can bake them at home! Potato fries/wedges are so much better baked! I mean, have you SEEN those deep fryers at McDonald's!? *shudder*

I found this recipe on Purple Foodie.

Garlic Potato Wedges serves 2
  • 2 large potatoes
  • 8 small garlic cloves, freshly crushed
  • 6 tbsp olive oil
  • 3 tbsp cornstarch
  • 1 1/2 tsp salt
  • 1 1/2 tsp freshly ground black pepper
  • ½ tsp paprika
  • ½ tsp garlic powder
Preheat oven to 400 degrees F.

Microwave the olive oil until just warm and add the garlic pieces. This infuses the garlic flavor with the oil.

Boil the potatoes in a pot for 10 minutes or just tender enough to be able to put a knife through. Make sure not to over-cook it. Run it under ice cold water and let it cool on a plate.

Cut the potatoes into wedges. First in half, half again, and then into three wedges (hope you got that ;) lol!) It makes 12 wedges per potato. Transfer wedges into a large bowl.

Pour in the olive oil mixture and add all other ingredients to the bowl. Make sure to rub the wedges with the oil and cornstarch so every wedge is covered evenly. Lay the wedges on a baking sheet lined with parchment paper, make sure they don't overlap! Bake for 30-40 minutes until golden and crispy. You may need to rotate the pan halfway through for even baking.

Saturday, September 24, 2011

The Best Chocolate Fudge Pie Ever (Will Rock Your Vegan World!)

Terrible picture, sorry! Took this with my phone and attempted to photoshop it to look better lol!

Oh my goodness, it's been too long! School has just been busy busy busy and dance has been busier busier busier, music classes have been difficult difficult difficult, and work on top of this has seriously exhausted me to the bone, and it's only the 2nd (or 3rd?) week into September! I'm actually frightened of how I will come out of this year. I've been getting 4 hours of sleep if not less every night, and instead of drinking water, it feels like coffee has replaced it. There was a Pro-d day yesterday and I spent all morning doing my homework, but in the evening I made this baby here!

I had no idea what to title this recipe made by Katie from www.chocolatecoveredkatie.com. I've tried many of her vegan recipes (they don't disappoint!) but this chocolate pie was truly a winner. I couldn't believe how sinfully delicious it was (rich, creamy, dark, chocolately...any kind of word to describe a great mousse-like pie!) and it was SO SO SO EASY! It takes 10 minutes from start to finish, I promise! I also couldn't believe what it was made of! Now, don't get grossed out- instead take it in with an open mind...and be curious! This pie is made of...

Tofu.

I know!! I have never made a dessert with tofu, but hey, there's a first for everything. I didn't know how versatile tofu really was, and how inexpensive it was! I see a future full of more tofu recipes :)

This pie was truly amazing! You can't taste the tofu at all, it's blended in very smoothly and as it chills in the refrigerator, the soy taste just vanishes into the chocolate. It just tastes like chocolate heaven after that!

Also, the calorie count on this thing. Compare it to a slice of Chocolate Mousse Pie at the Cheesecake Factory that weighs in at over 930 calories- a slice of this baby comes in at a skinny 143 calories per serving and 2.5 g of soy protein goodness!
And of course, if you aren't vegan you can use real milk!

Chocolate Fudge Pie serves 8
  • 1-9" graham crumb or pie crust* (optional)
  • 1 package (13 oz) silken/firm tofu
  • 1 tsp cocoa powder
  • 1 tsp vanilla extract
  • 2 tbsp nondairy milk (almond, soy, rice, coconut, etc...or real milk!)
  • 1/8 tsp salt
  • 2 tbsp sugar or sweetener
  • 1 1/3 cup chocolate chips
Melt the chocolate chips over low heat on the stove or in the microwave! Combine all ingredients together (minus the pie crust if using) in a food processor (or blender) and process until very smooth. Pour into pie crust (if using) or a pie dish. Refrigerate until chilled!

Note: If you use silken tofu like I did, it turns out like a mousse pie, it will be firmer if you use the firm tofu.

Important: Some tofu that you purchase will require you to boil it for a minute to kill any bacteria that may be on it. Please look for this note in the package and follow accordingly!

*adjust calorie count with your purchased pie crust

Friday, September 9, 2011

Happy Birthday Lulu!


Happy Sweet 16th Lulu!

Super last minute cake baking, but I hope you liked it! :) It was my pleasure making such a special birthday cake for you!

I was too excited actually, since I bought my new MARTHA STEWART icing spatula from Macy's a couple weeks ago and could not WAIT to use it. The cake is a basic white cake with fluffy vanilla-almond buttercream, if any of you were wondering!

This is just a gallery post, no recipe here, but I can definitely tell you how to do different colour layers! Just take a white cake recipe, separate the batter into however many layers you are going to make, colour each one to your preference, and bake! Make sure to cool completely and even freezing them for an hour before assembling helps too! Gradient cakes are the it-thing lately among food-bloggers, just to let you know, so many beautifully coloured cakes out there! Even rainbow layer ones!

Anyways, I hope your birthday was awesome! Happy Sweet 16th!! Love forever!

M.

Thursday, September 1, 2011

Warm Apple-Buttermilk Custard Pie

picture taken from www.cookinglight.com as I was unable to cut a piece out of mine- it was a gift!

The thought of it already being September pains my soul. So very muchhh. I'm definitely not ready to let go of summer! Everything's nicer in the summer! The weather, the activities, not being in school...

To finally come to reality about Fall-time, I baked an apple streusel pie for my complex neighbor here in Honolulu. Their family has been extremely welcoming since we've arrived, they let us share their wi-fi and gave us the key to the swimming pool so we could go swimming every day!

Apple pies are delicious, and who doesn't love streusel topping? And custard?! Combining the three is such a brilliant idea!

This recipe is from Cooking Light. Being a lazy one today...I copied and pasted the recipe from the site! Hehe.

Warm Apple-Buttermilk Custard Pie
  • 1 (9 inch) unbaked pie shell
  • 2 1/2 tbsp butter, chilled and cut into small pieces
For the filling
  • 5 cups (2 lbs) Granny Smith apples, peeled and sliced
  • 1 cup sugar, divided
  • 1/2 tsp cinnamon
  • 1/4 tsp salt
  • 3 large eggs
  • 1 3/4 cups non-fat buttermilk
  • 1 tsp vanilla
Preheat oven to 325 degrees F.

To prepare streusel, lightly spoon 1/3 cup flour into a dry measuring cup; level with a knife. Combine 1/3 cup flour, brown sugar, and 1/2 teaspoon cinnamon in a medium bowl; cut in butter with a pastry blender or 2 knives until the mixture resembles coarse meal. Place streusel in refrigerator.

To prepare the filling, heat a large nonstrick skillet coated with cookig spray over medium heat. Add sliced apple, 1/4 cup granulated sugar, and 1/2 teaspoon cinnamon; cook 10 minutes or until the apple is tender, sitrring mixture occasionally. Spoon the apple mixture into prepared crust.

Combine remaining 3/4 cup granulated sugar, 2 tablespoons flour, salt, and eggs, stirring with a whisk. Stir in buttermilk and vanilla. Pour over apple mixture. Bake at 325º for 30 minutes. Reduce oven temperature to 300º (do not remove pie from oven); sprinkle streusel over pie. Bake at 300º for 40 minutes or until set. Let stand 1 hour before serving.

Wednesday, August 31, 2011

Upside Down Pineapple Cake- A Day at Dole Plantation


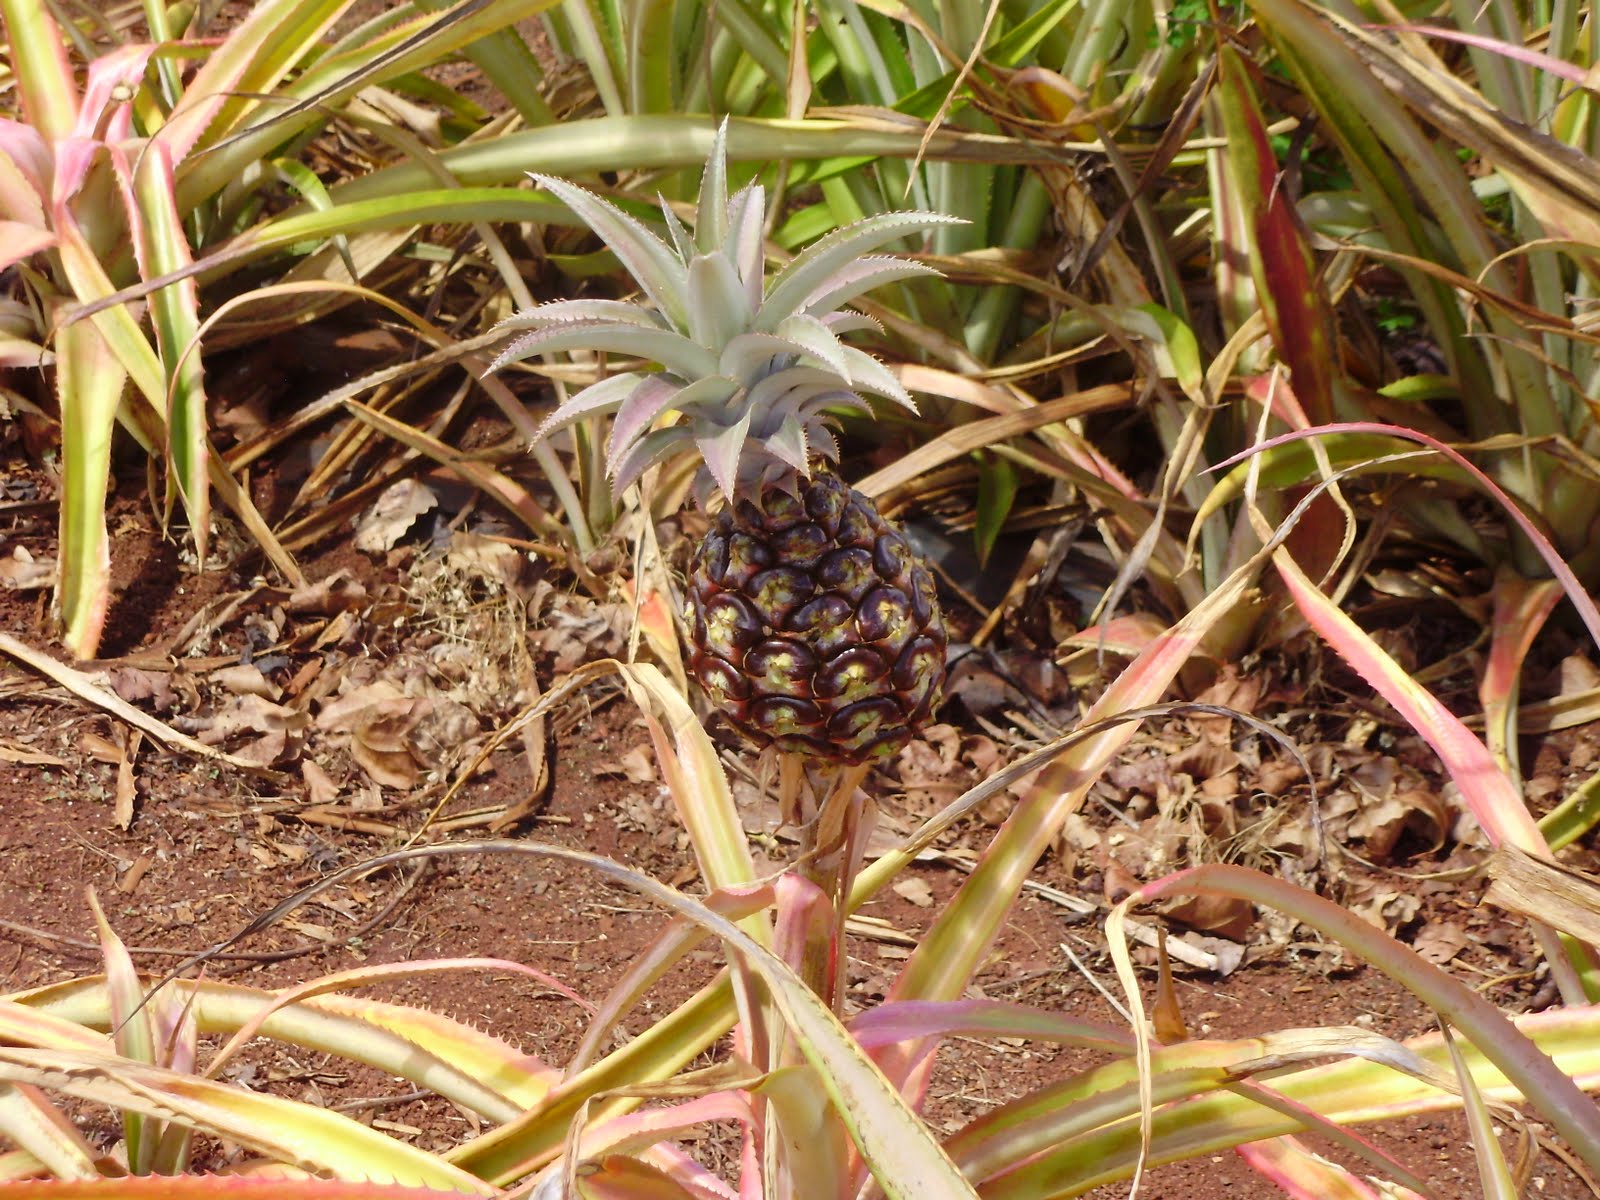
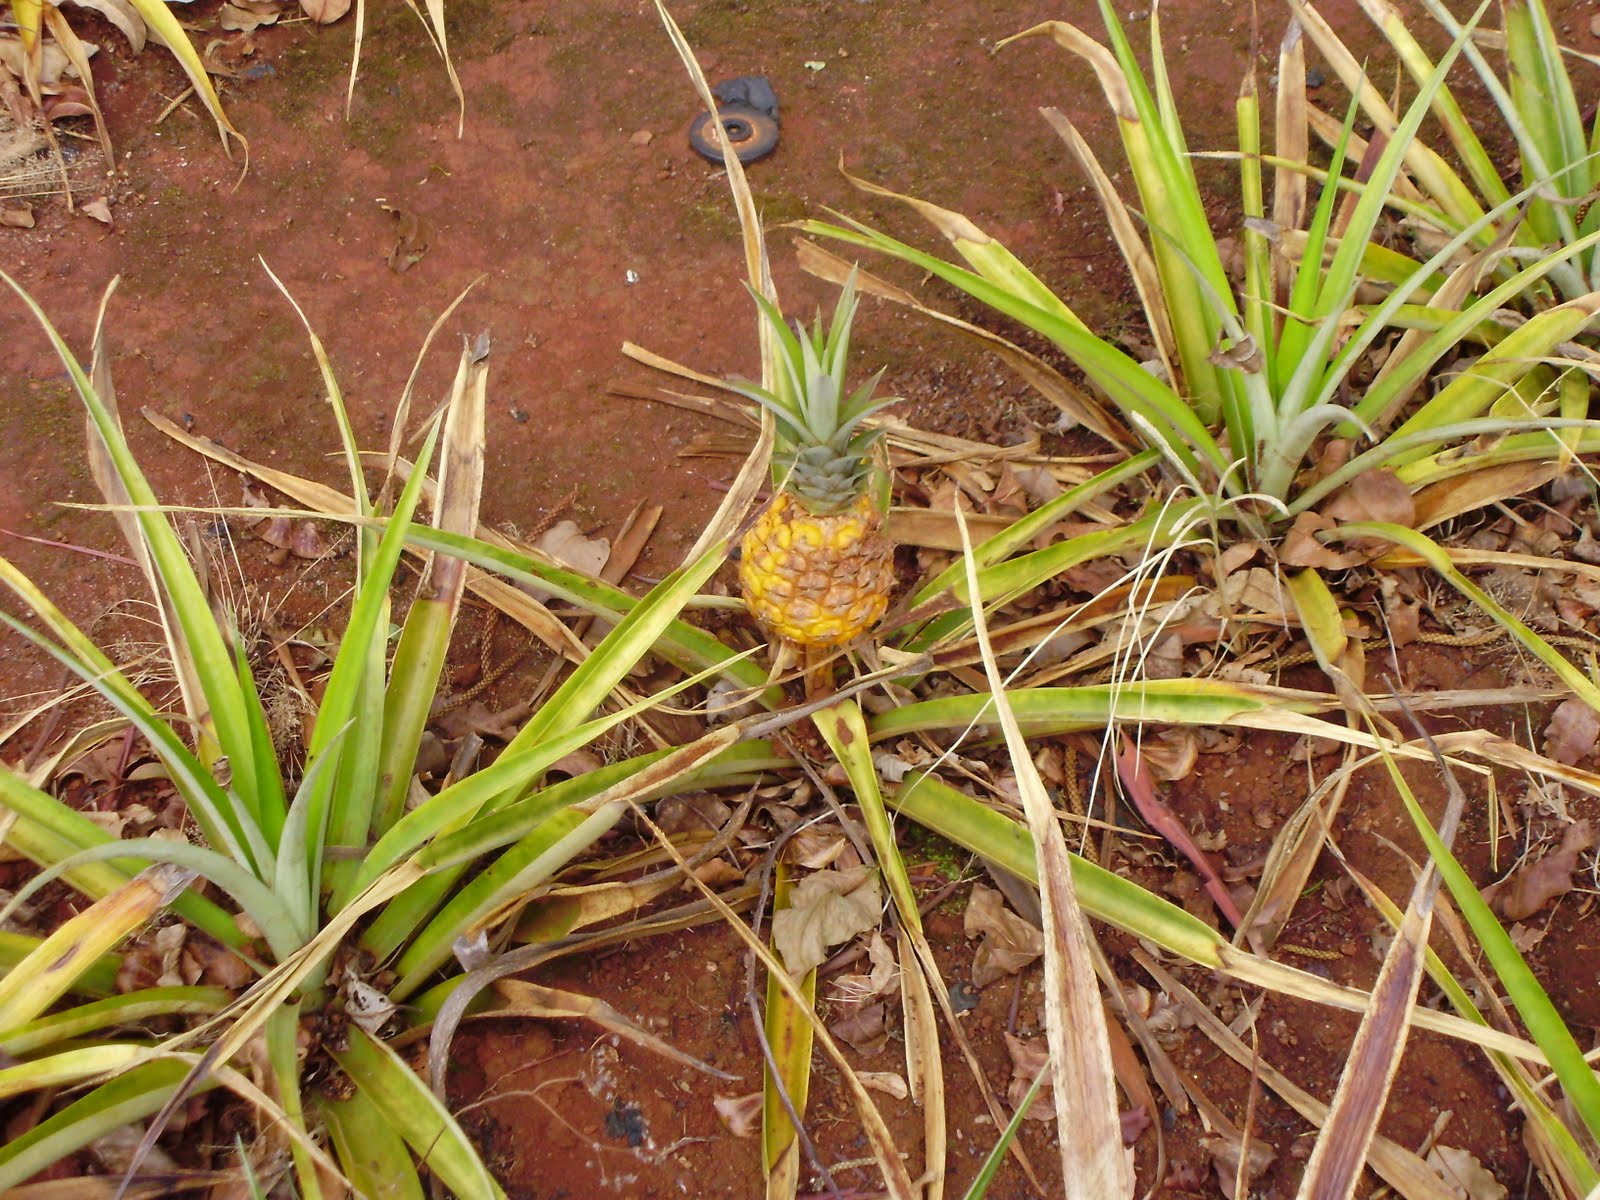
Aloha! Recently, I visited the Dole Plantation here in Oahu for the second time, and it still amazes me for some reason to see that pineapples grow from the ground! The Plantation itself is a tourist-magnet, and although it is quite overrated and overpriced to see the pineapple 'attractions' (yeah, I paid to ride a small train to see pineapple grow on the ground...) I still enjoy going there. They have the biggest souvenir shop of (mainly) pineapple based products and it's just so fun to browse through. Pineapple glazed popcorn, pineapple gumballs, pineapple paste, chocolate covered pineapples, pineapple chips...

Oh, and here are some pictures of the DIFFERENT kinds of pineapples I saw. I never knew they varied SO much in size and colour by region! Too cool!


As soon as I got back to the apartment, I knew I needed to make some Upside Down Pineapple Cake! This cake is super easy to make, and it's an all-time rustic favourite. It starts off with a "pan schmear", then you lay the pineapple on top, then you pour the cake batter, and in the oven it goes! You let it cool once it's done, and invert it onto a plate! Mmm, the pan schmear soaks through half the cake, coating the pineapple and the cake in a lovely golden buttery glaze. Who says cake needs icing?

Here's the secret though. The kitchen was in short supply of butter and brown sugar for the cake itself, so this cake is semi-homemade. I looked for a recipe that used yellow cake mix to make everything easier. I'm not a fan of baking with cake mix alone but I don't consider it cheating when you are only enhancing the mix. :) When I took a trip to the store however, they didn't have yellow cake mix. All they had was chocolate...but I did find a box of Cornbread Mix on sale, so I thought 'why not?'. The cake had transformed into an Upside Down Pineapple Polenta cake! I included both recipes, you can take your pick! I just love the texture of cornbread though with the yellow cake, you will get a much lighter cake! Also I am not sure if this brand of cornbread mix is well known so you are much more likely to find the yellow cake mix. Try both if you can!

Note: I used canned pineapples. Fresh is definitely better, but the canned variety are just as great in this cake and saves you A LOT of time!

Upside Down Pineapple Polenta Cake
  • 1 stick (1/2 cup) butter, room temperature
  • 1 cup packed brown sugar
  • 1 1/2 tbsp honey
  • 1 tsp rum (I opted this out)
  • 1/4 tsp vanilla
  • dash salt
  • 1 can Pineapple Rings in Pineapple Juice (The Dole brand was great!)
  • 1 box Krusteaz Fat-Free Cornbread Mix (This is the just-add-water variety)
  • 1 1/4 cup pineapple juice (Instead of water, I used pineapple juice from the can)
Preheat oven to 350 degrees F. Cream the butter with brown sugar, honey, rum, vanilla, and salt until smooth. Spread onto the bottom of a greased 9" cake pan. You will have some pan schmear left over. Set both aside.

Drain the pineapples but keep the juice. You can slice and lay the pineapples on top of the pan schmear in any way you like, many just choose to keep the rings and lay it out! What I did was cut each ring into three equal segments (kind of like cutting a Mercedes sign if you know what I mean..) and then overlapping each segment from the outside in...like laying bricks. With the remaining pan schmear, you can choose to just spread some on top the the pineapple slices. This syrupy glaze will soak through your cake keeping it nice and moist!

In a separate bowl, mix the Cornbread Mix with pineapple juice until smooth. Pour and spread on top of pan schmear and pineapple. Bake for 15 minutes, then rotate the pan and bake for another 30 minutes. Insert a knife into the middle of the cake, if it comes out clean it's done! Let it cool for 30 minutes before running a knife around the edge of the pan and inverting it onto a plate.


Upside Down Pineapple Cake (Using Yellow Cake Mix)
  • 1 stick (1/2 cup butter)
  • 1 cup packed brown sugar
  • 1 tbsp honey
  • 1 tsp rum
  • 1/4 tsp vanilla
  • dash salt
  • 1 can Pineapple Rings in Pineapple Juice
  • 1 box Duncan Hines Yellow Cake Mix*
  • 3 eggs
  • 1/3 cup vegetable oil
  • 1 1/3 cups pineapple juice from the can
*Any cake mix will do, you will just have to adjust the egg, oil and pineapple juice (instead of water) in accordance to the box instructions.

Preheat oven to 350 degrees F.

Cream the butter with brown sugar, honey, rum, vanilla, and salt until smooth. Spread onto the bottom of a greased 9" cake pan. You will have some pan schmear left over. Set both aside.

Drain the pineapples but keep the juice. You can slice and lay the pineapples on top of the pan schmear in any way you like, many just choose to keep the rings and lay it out! What I did was cut each ring into three equal segments (kind of like cutting a Mercedes sign if you know what I mean..) and then overlapping each segment from the outside in...like laying bricks. With the remaining pan schmear, you can choose to just spread some on top the the pineapple slices. This syrupy glaze will soak through your cake keeping it nice and moist!

In a separate bowl, prepare your cake mix with the eggs, oil, and pineapple juice following the box instructions. Pour batter over pineapple and smooth. Bake for 30-45 minutes until inserted knife comes out clean. Cool for 30 minutes before inverting! Enjoy!

Tuesday, August 30, 2011

Sweet Potato Pie (Faux Pumpkin Pie!)


(Sorry about the rushed pictures, I really didn't want my aunt to gawk at me macro-ing the s**t out of my camera and pouncing around the slice of pie to get a 'decent picture'. I seriously need a better camera)

Wow I had a pretty amazing/intense work-out at the gym today. I ran for 50 minutes on the treadmill, just under 9km! And then I finished with an advanced pilates class and holy I'm going to feel it tomorrow...right now I'm at a Starbucks in Waikiki just enjoying the day by myself. I'm alone today so it's relaxing to walk the streets though I'm too tired now to do the shopping that I wanted to get done...darn!

About the recipe...yes, it is a pie recipe. A Fall season pie recipe....
I'm not necessarily welcoming Fall with open arms and a warm embrace, but I've been wanting to make a sweet potato pie (as I am not TOO fond of pumpkin pie) for a long time! And with September just around the corner...(*cries*)...why not now? It's super easy, and so very tasty. I love yams and sweet potatoes, and this recipe makes a very rich-tasting pie without all the fat and calories!

The only boo-boo I made with this pie is that I was supposed to buy the sweet potato with orange flesh (CAN SOMEONE PLEASE TELL ME WHAT THE DIFFERENCE IS IN THE NAME BECAUSE I ALWAYS BUY THE WRONG ONE!) but I ended up (again- must be the 3rd time now) with the sweet potato with the yellow flesh. There isn't anything wrong with the yellow-fleshed sweet potato, the flavor is very much similar, but the pie was supposed to be a show-stopping gorgeous orange colour. I titled it "Faux Pumpkin Pie" because the filling turned out to be slightly brown like pumpkin pie. So if you know your orange sweet potatoes from your yellow, do buy the orange ones. The colour on the pie will be amazing! And don't try telling me it's yam that I'm looking for because that's what I first thought about yam, but the yam flesh was yellow too. I seriously need to google this for future reference.

Oh, and because my aunt doesn't have a mixer I made this pie using her blender. Go me! :D

Sweet Potato Pie makes 1 pie, 8 slices
  • 1 unbaked 9" pie crust
  • 2 large sweet potatoes
  • 2 tbsp butter, room temperature
  • 3/4 cup brown sugar, packed
  • 2 eggs
  • 1 tsp cinnamon
  • 1/4 tsp nutmeg
  • 1/2 cup skim milk
  • 1 tsp vanilla
  • 1/2 cup walnuts, finely chopped
  • 1/4 cup brown sugar
Boil the sweet potatoes for about 55 mins, or until soft. Under cool running water, peel the skin. Puree in a blender for 1 min, until smooth. Add butter, and mix well. Transfer mixture to a bowl.

Using an electric mixer, mix in sugar, eggs, cinnamon, nutmeg, milk, and vanilla until smooth. Pour into pie crust and bake at 350 degrees F for 55-60 mins, or until the filling is set. You can insert a knife into the center of the pie, if it comes out clean, it's done.

Sprinkle walnuts on pie and 1/4 cup brown sugar. Broil in oven until brown sugar is bubbly (watch carefully! you don't want to burn the sugar!).

Cool to set the filling for about 1/2 hour before cutting to serve! Enjoy!

Monday, August 29, 2011

Mango-Papaya-Coconut Sherbet


Hello hello again!

I'm in such a good mood right now! It's about 3:00 in Honolulu, and I just feel like my day's been started off right, and it's going in a good direction! It was a rainy one today, so we hit up the 24 Hour Fitness gym in the morning! I had a REALLY AMAZING short and sweet 1/2 hr run on the treadmill, and I was glad to see that I haven't spiralled tooooo far downhill in fitness as far as running goes. After that I finished off with a pilates and yoga fusion class. My arms...ouch!

We decided to grab some lunch so we went to the Ala Moana market place food court, and I spotted this salad bar. Well, it was a salad bar to a Steak&Fish Place but a salad bar nonetheless. You don't know how excited I get when I see salad bars. So many wonderful veggies (I've been eating them like crazy!) and little add-ons like chickpeas, corn kernels, seeds, yum! Now, I usually pay for salad at the bar by weight, and it just adds on and on and I end up paying over $10 for a small salad. This place, I paid around $4.50 for a "small container" first and then they just gave it to me to put whatever I wanted on it. Wait, are you kidding me!? No salad by the weight?! Whatever can fit inside this small container for $4.50!? Seriously just made my day. I wish I'd gotten a large because the container was overflowing and I was seriously going crazy with it.

Oops I'm rambling. About the recipe! I had originally wanted to make a chocolate brownie ice cream, but Honolulu is FULL of these HUGE juicy mangos and papayas, so I decided to make a tropical sherbet! The method I used doesn't require an ice cream maker, but if you have one, use it by all means! Also, the original recipe called for cream but I substituted it with some evaporated milk. You can even get a can of non-fat evaporated milk too, it'll save you the calories! So try it! Squeeze every drop out of summer before school starts!

Mango-Papaya-Coconut Sherbet makes approx. 4 cups
  • 2 cups mango, cubed (about 1 HUGE mango or 2 small ones)
  • 1 cup papaya, cubed
  • 1/2 cup sugar
  • 1 cup evaporated milk
  • 1 cup ice
  • 1 tsp vanilla extract
  • 1 tbsp coconut milk powder (optional, you can sub 1 tsp coconut extract if you have it)
Puree the mango, papaya, and sugar in a blender until smooth. Add remaining ingredients in blender and puree until smooth. Pour into a deep freezer-safe container and put it in the freezer for 45 mins.

1. After 45 mins, give it a stir/mash to break up any ice crystals that may have formed.
2. For the next 2 hours, at each 30 min interval, take out the container and mash the sherbet to break up ice crystals. Set a timer so you don't forget!
3. Freeze over night! Scoop and enjoy the next day!

Notes: You can substitute the papaya for strawberries or even bananas! Either would compliment the mango nicely!

Blogging from Honolulu- Leonard's Bakery

Aloha! I've been missing baking so much! :( I'm on vacation in Honolulu, currently staying with my aunt, and it's too hot to turn on the oven! There's not much bakeware or a mixer either! I have some recipes coming up though, I think! She's been wanting me to bake her something. :P

In the meantime, I'll blog about this all-famous Leonard's Bakery that they have here.
Every time we drive by, there's a line up that floods the outside patio all around the parking lot. "What's the big deal?" I thought. And after some research and a visit, I can definitely understand why this bakery stands out on the Hawaiian islands!
Leonard's has been up since July 1 1952, and it's a real authentic bakery! The story is that in June 1882, Arsenio and Amelia DoRego sailed into Maui from Portugal to work in the sugar cane fields. Their grandson, Leonard, moved to Honolulu with his wife and opened a bakery!

The bakery is known for their Malasadas, originally Portuguese, but the islanders have adopted it as the "Hawaiian Donut". It is sort of like a Tim-Bit, but a lot bigger and a thousand times better! It was so hot, fluffy, and soft... They make it constantly throughout the day, which is why people line up to get their's nice and fresh, right out of the fryer! This is the original sugar Malasada, one of their two originals (plain sugar and cinnamon sugar)

They are a little bit smaller than fist! I don't think I'll enjoy any other American donut after this. Since their two original flavors, they started a line of custard/cream filled Malasadas, such as chocolate, custard, or haupia, kind of like a coconut cream. That's what I got:
So good!

The bakery also has many other kinds of pastries, cakes, and breads. I kind of liked the rustic, home-made look of their goodies! Felt and tasted like home baking! :)

Hopefully I'll get to visit again soon!! And I've got a recipe (hopefully) coming up so stay tuned! Enjoy the rest of your summers! (Can you believe it's almost over?! *cries*)

Mary